Potstickers – Chinese Dumplings

Potstickers

My husband and I finished the last grape harvest of the season. So tiring, but it is a relief to have that process completed. The weather conditions this year have contributed to problems with the health of my vines. I’ll be fertilizing and watering for the rest of the growing season to give them a boost. Healthy vines now mean a good crop next year. A grower’s life is full of transitions.

I worked in the garden last week after the weather cooled. I pulled waist-high weeds and discovered that my okra is still alive. After cleaning that up, I trimmed off all the huge okra pods, giving the plants an opportunity to strengthen and produce new pods. I’m looking forward to picking okra again this week. Tilling new ground is in my future and I’ll be planting the fall garden soon – just another transition.

We helped one of our sons move to Tyler last weekend, so David and I are empty-nesters again. It’s a happy/sad occasion when a child moves out of the house – and sometimes that same child moves out more than once.

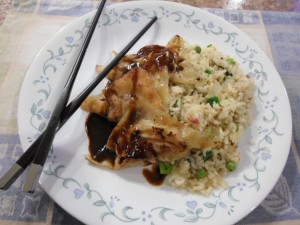
Parents want their children to grow up and be able to survive on their own but when they leave, the house seems so empty. Before Ben transitioned to his new life in Tyler, he cooked his last weeknight dinner for us. He made potstickers (Chinese dumplings) from scratch. They can be found in the frozen food aisle of the grocery store, but they just don’t compare to ones that are homemade.

Pork Potstickers
1 lb. ground pork
1/2 c. onions, finely chopped
1/4 c. red pepper, finely chopped
2 eggs, beaten (or 3 pullet eggs, beaten)
1 Tbsp. ketchup
2 tsp. mustard
1/4 c. Worcestershire sauce
2 tsp. brown sugar
1/2 Tbsp. kosher salt
1 tsp. black pepper
1/4 tsp. cayenne pepper
50-60 wonton wrappers
vegetable oil for frying, divided
2 c. chicken stock, divided

Combine the ingredients beginning with pork through cayenne pepper. Mix well and set aside. To form each dumpling, work with one wonton wrapper at a time. Brush the edges with water and place a rounded tsp. of the pork mixture in the center. Fold over and seal the edges. Ben sealed forming a flat triangular dumpling. I usually fold it over, stand the dumpling on the long edge and pinch the dough together to form a ruffled purse. Either way will work.

Continue to make dumplings until you run out of wrappers or pork mixture. Then drizzle about a Tbsp. of oil in a large sauté pan over medium heat. Add 10-12 dumplings at a time to the pan, being careful not to overcrowd. Cook for 2 minutes without moving the dumplings. That will create a nice golden sear and they will be stuck to the pan – hence the name. Then add 1/3 c. chicken stock; turn heat to low; cover and cook for another 2 minutes. The liquid will release the dumplings and the steam will cook them until done.

Remove the dumplings from the pan and start the next batch. Clean the pan by deglazing with water and wiping clean between batches if necessary. Keep finished dumplings warm in a 200-degree oven while making the rest.

We had leftover pork mixture, so I cooked it and added it to a pot of rice and vegetables. Ben served it with the potstickers, but it could also have made another meal.

Quiche and Frittata

Quiche

Last week was busy with getting ready for the Rains County Visitors Center open house on Thursday. The building was completely transformed with a good cleaning, a fresh coat of paint and donated artwork from the community. Members from the Rains County Chamber of Commerce and the Rains County Tourism Distribution Board worked hard to make the opening a success.

Last week my twin seven-year-old nieces also came for one last visit before school starts. Those sweet girls kept me busy and we gave their mom a much-needed break before she returns to teach fifth grade in Arlington.

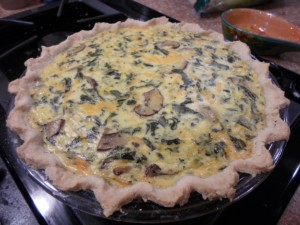
After a round-trip to the Dallas-Fort Worth metroplex and back, I was glad it was Ben’s night to cook dinner. I only had to make the pie shell for that tasty quiche and Ben prepared the rest.

Spinach and Mushroom Quiche
2 Tbsp. butter
2 c. sliced mushrooms
2 c. Greek yogurt
4 eggs
1/2 c. grated Parmesan cheese
1/4 c. all-purpose flour
1 Tbsp. milk
1 Tsp. onion powder
1/4 tsp. garlic powder
1/4 tsp. salt
6 drops hot pepper sauce, or more to taste
5 oz. (1/2 package) frozen chopped spinach, thawed and drained
2 c. shredded cheddar cheese
1 pie shell

Preheat oven to 350 degrees.
Melt butter in skillet and sauté mushrooms about 5 minutes or until tender. Place yogurt, eggs, Parmesan cheese, flour, milk, onion powder, garlic powder, salt and pepper sauce in a blender. Blend until smooth. Pour mixture into a large bowl. Add mushrooms, spinach and cheese into the mixture and stir until blended.

Pour mixture into the prepared shell placed in a pie pan. Bake until lightly browned and until a toothpick inserted in the center comes out clean, about 45 minutes.

Now that my young chickens are laying, I have plenty of eggs. Some of those eggs are too small to sell, so I use them for our dinners. One great way to use eggs is in making a frittata.

Ham and Cheese Frittata
2 Tbsp. butter
1 large onion, diced
1 tsp. salt
1/2 tsp. pepper
8 large eggs (or 12 pullet eggs)
1/4 c. milk
1 c. diced ham
1 c. cheddar cheese, grated
1 Tbsp. fresh chopped parsley, basil, thyme or oregano

Sauté onions in butter until soft. In a separate bowl, whisk eggs and milk. Add ham, cheese and herbs and stir to mix. Add onions to the mixture too.

Pour the mixture into a non-stick, oven-safe skillet over medium-low heat. Stir a few times, but then let the mixture cook and the bottom set. It will take about 5 minutes. Then transfer the skillet to the oven and bake at 400 degrees for another 5 minutes or until the egg mixture sets on top.

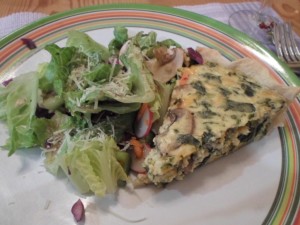
Frittata may be made with different ingredient combinations. Instead of ham and onions, try shrimp and artichoke hearts, ground beef and peas or chopped crispy bacon and chopped asparagus. Try mozzarella, Swiss or feta cheese instead of using cheddar. Frittata is great for breakfast, but just add a side salad and it’s a complete lunch or dinner.

Quiche and salad

Pasta Primavera

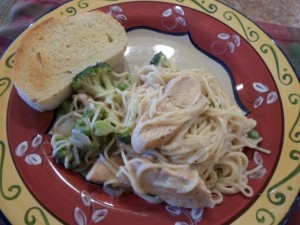
Pasta primavera

Pasta primavera is a versatile dish made with butter, cream, cheese and lightly cooked vegetables. A meat such as chicken or seafood may be added, and mixing up the combination of vegetables keeps it interesting.

It’s great any time of year; however, I make it most often in the summer because the sauce is light and fresh garden vegetables are readily available.

Sunday evening, I rummaged around in the refrigerator. That’s a weekly ritual since Monday is our trash pick-up day and I try to use items before my husband declares them suspect and need to be thrown away.

That’s one area where we disagree. If a product is even close to the use-by date, he thinks it should be thrown out. I think one should also consider the way it looks and smells. However if he used that logic, blue cheese and buttermilk would be thrown out as soon as I bought it. I have to watch him.

I found three heads of broccoli that needed to be used along with a green bell pepper. A red one would have made a prettier dish, but I like to use what I have. I also added a partial bag of frozen green peas. Any combination of 3-4 vegetables like squash, peppers, carrots, broccoli, peas, asparagus, or green beans make a great dish. I skip corn, potatoes or other starchy vegetables because the sauce will be served over pasta and that’s plenty of carbs.

Pasta Primavera Sauce
1 Tbsp. olive oil
1 large onion, chopped
2 cloves garlic, minced
1/4 c. white wine
1 c. chicken stock
1 c. heavy cream
1 c. Parmesan cheese, grated
Salt and pepper, to taste

Sauté the onions in olive oil until translucent. Add garlic and cook about 30 seconds. Deglaze the pan with wine. Then add chicken stock and cook until the sauce is reduced by about half. Turn the heat off and let the pan sit while you prepare the vegetables or meat that will be added. Don’t pour the heavy cream into the hot pan since it will likely curdle.

Usually steaming the vegetables is best to keep them from being over-cooked. I usually steam vegetables in the microwave. However, I put the frozen peas directly into the sauce and let them warm.

I actually seared 4 chicken breast halves in the sauce pan on the stove and then removed them and started the sauce. Then I returned them to the sauce pan with the chicken stock so they would finish cooking. Just remove them when done and let rest about 15 minutes before slicing. You may also use previously cooked shrimp or chicken.

Prepare the pasta. I used angel hair, but any pasta may be used. After the pasta is done, reserve about a cup of the water and then drain.

Now that all the other ingredients are ready, it’s time to finish the sauce. Turn the heat to low and stir in the heavy cream and Parmesan cheese. The sauce should be light and creamy as opposed to heavy and thick. Add the vegetables and meat. Taste and add salt or pepper as needed. Cook about 5 minutes just to help the flavors blend together. Add the cooked pasta and turn off the heat.

I usually let the dish sit while I prepare garlic bread or a salad. The pasta will absorb some of the sauce while it sits. When ready to serve, add a little of the reserved pasta water if the sauce is too thick.

I garnished with more Parmesan cheese and red pepper flakes. Chopped herbs like parsley or basil also make a delicious garnish.
Using fresh vegetables is best, but leftovers may be reheated and used in the primavera sauce too. Another great way to clean out that fridge!

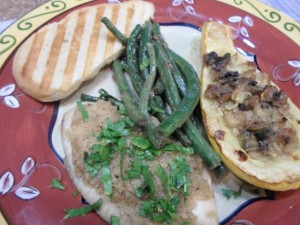
Baked fish, stuffed squash and seasoned green beans

Fish and stuffed squash

I am delighted to have the Blanc du Bois grape harvest behind me. Everything went smoothly and I was pleased to have the help of my new de-stemmer/crusher and fruit press. The grape juice was flowing and tasting very sweet. With one more harvest to go, I’m feeling relief and looking forward to the fall season – and a fall garden.

I’m still harvesting squash and a few green beans. I could make a dinner with just that, but my husband and son both would wonder where was the meat. So, I thawed some tilapia and added baked fish to the meal.

Baked Tilapia
4 fish filets
1 Tbsp. lime juice
1 Tbsp. mayonnaise
1/8 tsp. onion powder
1/8 tsp. black pepper
1/2 c. panko bread crumbs
1-1/2 Tbsp. melted butter
Combine lime juice, mayonnaise, onion powder and black pepper. Place fish filets on a baking pan and spread the mixture over the filets. Sprinkle bread crumbs on top of the fish. Bake in a 375-degree oven for 20 minutes or until the fish is done. Garnish with chopped parsley.

Seasoned Green Beans
4 handsful fresh green beans, cleaned
3 Tbsp. olive oil
3 cloves garlic
1 onion, chopped
1 Tbsp. anchovy paste
Heat olive oil in a skillet over medium-low heat. Cook garlic until it turns a light golden color. Then discard the garlic, only using it to flavor the oil. Sauté onions until tender and then stir in the anchovy paste. Add green beans and toss until coated.
Cook until they are crisp-tender. Remove from pan and keep warm, reserving the oil and onions for the baked squash.

Stuffed Baked Squash
4 crook neck squashes, halved
1/2 cup kalamata olives
1 Tbsp. capers
3/4 c. bread crumbs
1/2 c. Parmesan cheese
Salt and pepper, to taste.
Cook squash halves in the reserved oil and onions for about 5 minutes on each side. Remove to a baking dish. Using a spoon, scoop out most of the squash flesh and seeds. Chop that up and add to the skillet. Remove the skillet from heat and add olives, capers, bread crumbs and Parmesan cheese. Taste and add salt and pepper if needed.

Spoon the mixture evenly into the squash halves. Bake in a 400-degree oven for 15 minutes or until golden brown.

Cucumbers

Cuc water

Since my garden is running a little behind this season, I am just now getting tons of sweet cucumbers. There seem to be endless possibilities for using them. In the past, I had several cucumber recipes printed in this column and they are also available on my website, but here’s a few more.

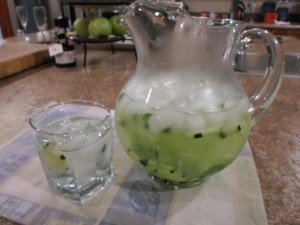
Cucumber Mint Water
2 medium cucumbers, peeled and sliced
8-10 mint leaves, torn
2 quarts water
1 quart ice cubes
Mix all ingredients together in a large pitcher. Refrigerate at least a few hours before serving to allow the cucumber and mint to flavor the water. That drink is cool and refreshing on a hot summer day.

Cucumber Egg Salad
6 boiled eggs, peeled and cubed
2 cucumbers, peeled and cubed
4 dill pickle spears, cubed
1/3 c. mayonnaise
Salt and pepper, to taste
Cut the eggs, cucumbers and pickles into about 1/2-inch cubes. Toss all the ingredients together except for the cucumbers. Add those in just before serving on toasted bread. Chopped chives or green onions make a tasty and colorful garnish. Serve immediately before the cucumbers let off liquid.

Cucumber and Watermelon Salad
1 small seedless watermelon, cubed
4 cucumbers, cubed
1 tsp. salt
1 Tbsp. sugar
1/3 c. white balsamic vinegar
Cut the watermelon and cucumbers into 1-inch cubes. Whisk together salt, sugar and vinegar. Pour over the watermelon and cucumbers. Gently toss to coat.

Cucumber, Tomato and Cottage Cheese Salad
16 oz. cottage cheese
1 pint cherry tomatoes, halved
2 cucumbers, peeled and diced
4 green onions, diced
Salt and pepper, to taste
Gently mix all ingredients together. Garnish with fresh herbs, such as parsley, dill weed, mint or basil. If using large tomatoes instead of cherry, dice them and sprinkle over the top of the dish and they’ll mix in while serving.

Catfish

Eggplant and baked fish

With just two or three weeks left before grape harvest, I’m praying for dry weather and no fruit beetles. After watching the weather report, I believe dry weather is a given. Fruit beetles, on the other hand, are harder to predict. It only takes one beetle to find the vineyard inviting and the next thing you know, all of its friends show up.

I spend most of my free time walking the rows, shaking the trellis wires and listening for their buzz. While doing that I take the opportunity to get rid of wasp nests since it’s easier to harvest when pickers aren’t getting stung. I’m also on the constant look-out for bird nests. I pull those out while they are being built because I don’t have the heart to do it once babies are hatched. For some reason, wasp babies don’t pull at my heartstrings.

Life becomes so much easier for me after harvest. Hopefully I’ll be able to catch up on weeding my gardens, cleaning the house – and the chicken coop – and finishing the many projects on my “to do” list.

My friend, Catfish Tommy, brought me two quart-sized freezer bags of catfish filets. I tried two recipes that I think are good enough to share.

Baked Catfish with Tomatoes and Eggplant
1 eggplant, cubed
1 large onion, chopped
3 cloves garlic, minced
2 Tbsp. olive oil
2 tsp. salt
1 tsp. pepper
1 tsp. dried basil
1 tsp. dried oregano
1/2 tsp. red pepper flakes
2 Tbsp. capers
1/2 c. black olives, sliced
28 oz. canned tomatoes
2 tsp. sugar
6 catfish filets

In a large sauce pan, sauté eggplant, onions and garlic in olive oil. Add spices and cook until the onions are translucent. Add capers, black olives, tomatoes and sugar. Continue to cook until heated through.

Prepare a baking pan with cooking spray. Layer half the eggplant and tomato sauce evenly in the bottom of the dish. Next layer the fish filets. Then top those with the remaining sauce. Cover with foil and bake in a 400-degree oven for 20-25 minutes. Let cool about 10 minutes and serve with a sprinkle of Parmesan cheese.

For a lighter option, try the following Asian-inspired recipe.

Catfish over Rice Noodles
5 cloves garlic, thinly sliced
3 strips of lemon rind
1/2 tsp. red pepper flakes
1 medium onion, chopped
2 Tbsp. fish sauce
2 Tbsp. fresh ginger, grated
1 tsp. sugar
1/2 tsp. ground turmeric
1 lb. catfish, cut into 1-inch pieces
2 Tbsp. vegetable oil
1/2 tsp. salt

In a sealable bag, mix the garlic, lemon rind, pepper flakes, onion, fish sauce, ginger, sugar, turmeric and catfish together. Let marinate for 4 hours.

Heat vegetable oil in a skillet. Remove the lemon rind from the bag and pour the catfish and remaining marinade into the skillet. Add salt and cook until the catfish browns on each side.

Serve over prepared rice noodles and garnish with chopped basil, cilantro, parsley and green onions.

Braised short ribs with cucumber and melon salad

Braised Short Ribs

It certainly feels like we are in the “dog days of summer.” My Beagle pup Sally would agree. She’s normally my constant companion outside but is not happy about the heat and sneaks back to the house hoping to be let inside. Sunday, I took a cue from her and at 3:30 headed to the house too. I slow-cooked dinner while working on miscellaneous projects in the air-conditioning.

Braised Short Ribs
4 short ribs (about 3 to 3-1/2 lbs.)
1/2 cup flour for dusting
1 pinch each salt and pepper
1 Tbsp. olive oil
5 carrots, chopped
4 celery ribs, chopped
2 onions, chopped
6 cloves garlic, minced
3 bay leaves
2 tsp. dried thyme
1/2 c. red wine
28-oz can whole tomatoes
1 quart beef broth
salt and pepper to season vegetables

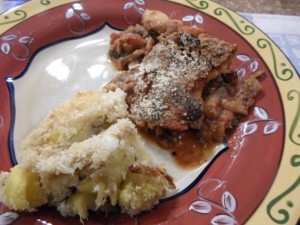
Coat the short ribs with flour seasoned with salt and pepper. Heat oil in a large oven-safe pot. Sear each side of the ribs on high heat until brown. Remove ribs from pan, reduce heat to medium and sauté vegetables, seasoned with salt and pepper until onions turn translucent. Add herbs, wine and tomatoes. Stir all ingredients together, breaking up tomatoes and cook for about 15 minutes.

Add the ribs to the pot and pour enough beef broth to cover them. Reserve any extra broth to add to the pot later. Cover and cook in a 375-degree oven for 3 hours. Check every hour, making sure liquid still covers the ribs. Add leftover broth as needed.
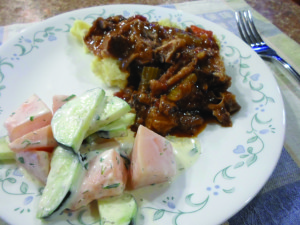
When done, the meat fell off the bones, which I kept for my pup. Cube the larger pieces of meat and return to the pot. I skimmed about a half cup of grease off the top. Then I decided to thicken the mixture and added 2 Tbsp. cornstarch dissolved in a little water to the short ribs, heating on the stovetop until the mixture thickened to the consistency of gravy. The short ribs were rich and tasty served over garlic smashed potatoes.

Oh, remove the bay leaves before serving. I usually forget to mention that because I’ve always told my family that if you get a bay leaf on your plate, it’s good luck. However, it’s better luck if you don’t eat it. While bay leaves help season the dish, eating the leaf can be bitter.

I also made a simple side salad of cucumbers, melon and creamy herbed dressing.

Creamy Melon and Cucumber Salad
1 cantaloupe, cut into chunks
2 cucumbers, peeled and cut into chunks
1/3 c. yogurt
1/3 c. mayonnaise
1 tsp. honey
1 tsp. each chopped fresh dill, parsley and thyme
a pinch of salt and pepper

Mix yogurt, mayonnaise, honey and seasonings together. Pour over cantaloupe and cucumbers. Refrigerate for at least 30 minutes before serving.

Taquitos

Taquitos

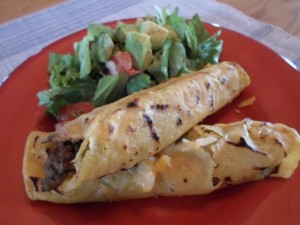
Last week and weekend were busy and chaotic. When I found time to cook, I made taquitos. The recipe makes about 30. They refrigerate and reheat well, so are great for this time of year when I struggle to find time to cook.

Taquitos
1-1/2 lb. ground turkey
1 tsp. salt
1/2 tsp. black pepper
1 large onion, finely chopped
2 cloves garlic, minced
1 tsp. dried cumin
1 can black beans, rinsed and drained
1 bag (about 8 cups) fresh spinach, cleaned and torn
8 oz. cream cheese softened
30 corn tortillas
olive oil for brushing

Season the turkey with salt and pepper and brown in a large skillet. Add onion and cook until translucent. Then add garlic and cumin, stirring for about 30 seconds. Toss in the beans and spinach, continuing to cook on medium-low until the spinach wilts. Add the cream cheese and stir until it melts into the mixture and creates a thick sauce. Remove from heat.

Heat another skillet to medium-high. Brush olive oil on each side of a corn tortilla and cook for about a minute on each side, long enough to turn lightly brown and crispy. Add a heaping tablespoon of the turkey-bean-spinach mixture and roll the tortilla. Lay the taquitos seam side down in a 9-13″ baking pan.

I work continuously brushing olive oil on a corn tortilla while one browns. Then remove the browned tortilla and start browning the next while filling, rolling and tucking into the baking pan. Flip the tortilla in the pan and brush olive oil on the next. Keep going until all 30 are filled or the mixture is gone. I filled 2 baking pans and baked in a 350-degree oven for 20 minutes.
Let cool before serving. Those are great dipped in queso sauce, sour cream or guacamole. Serve with a side salad and it’s a meal.

Refrigerate leftovers and reheat for about 30 seconds in the microwave for a quick breakfast or snack as you head out the door for another busy day.

I’m still picking blueberries. I also bought strawberries and blackberries at the grocery store. I love to mix them up and enjoy with yogurt. It’s almost as good as ice cream. Any fruit is a dessert when dipped in a lightly sweet lemony yogurt sauce.

Yogurt Sauce
2 c. plain yogurt
1 lemon, juiced and zested
2 Tbsp. honey
Whisk all ingredients together and serve chilled.

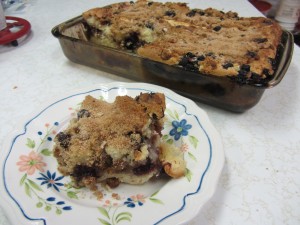
Blueberry Coffee Cake

Blueberry Coffee Cake

I’m back with another blueberry recipe this week. We picked another 5 pounds last weekend. I don’t usually cook sweet dishes so I’m looking for a few savory blueberry recipes. I’m thinking something with rosemary and lemon zest. But for now, here’s something sweet.

Blueberry Coffee Cake
Batter:
2 c. flour
1 tsp. baking powder
1/4 tsp. salt
2 c. sugar
1 c. butter
2 eggs
1 c. sour cream
1/2 tsp. vanilla extract
Crumble:
1 c. brown sugar, packed
1 c. flour
3 Tbsp. butter, melted
2 tsp. cinnamon
2 c. fresh blueberries
1 c. pecans, chopped

Combine flour, baking powder and salt in a bowl and set aside. Using an electric mixer, beat sugar and butter until light and fluffy. Add 1 egg and blend before adding the other egg. Slowly stir in the sour cream and vanilla extract. Then add the flour mixture and blend until incorporated.

Prepare a 9×13″ baking dish with cooking spray. Spread half of the batter into the dish.

Mix brown sugar, flour, butter and cinnamon together making a crumble. Sprinkle half each of the blueberries, crumble and pecans over the batter in the dish. Spread the remaining batter on top. Then sprinkle on the remaining berries, crumble and pecans.

Bake in a 350-degree oven for 50 minutes or until done – toothpick inserted in the middle will come out clean.

Blueberries, blueberries and more blueberries

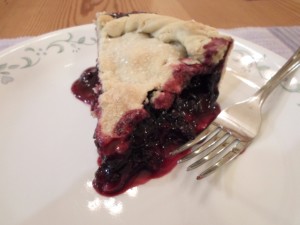
BBerry Pie

Blueberries are my favorite fruit. I buy them fresh, frozen and dried to eat as a snack or with my morning yogurt. A few years ago I was at the grocery store looking at a high-priced package of the fresh berries, contemplating if they were worth it. A nice older gentlemen leaned over next to me and quietly said, “You know, you can grow those.” I laughed and said that I probably should.

That next spring, I bought four bushes from a local nursery and planted them. Three thrived and the fourth succumbed to an ant colony that I still can’t seem to get rid of. I didn’t expect berries that first year, but thought I’d get a few the second. I saw the flowers bloom, but no fruit. The third year, I picked about a handful and was pretty disappointed. I planted three more bushes of another variety because I had read that planting multiple types together is a good idea. I just can’t remember why.

Last year the first three bushes were big, beautiful and full of flowers, and a little later had green berries. I watched the berries dwindle over the passing weeks. I was stumped until the day I found several of my hens gathered around the bushes. They would fly up, flap their wings and beat at the bushes. When they landed, they quickly began to peck the ground below. My free-to-roam-where-they-please chickens were eating all of my berries before they even had a chance to ripen. No wonder their yolks are a deep orangey-yellow.

This year I wised up and pounded in T-posts and wired goat fencing to completely enclose the bushes. I am pleased to say that as of yet, no chickens have scaled the fence, and the wild bird population hasn’t damaged much.

A week ago I picked 3.5 pounds of berries from those first three bushes. Last weekend, my son picked 8 more. There are still ripening berries to be picked.

I froze a gallon bag and I also made a large blueberry pie. It was so large I ended up cooking it in a casserole dish.

Blueberry Pie
6 c. blueberries, rinsed and dried
1 c. sugar
1/3 c. flour
1 tsp. Kosher salt
1 tsp. fine lemon zest
1 Tbsp. freshly squeezed lemon juice
2 Tbsp. cold butter, cubed

In a large bowl, stir together the blueberries, sugar, flour, salt and lemon zest. Let sit while preparing the pie crust (recipe to follow).

Refrigerate the dough for at least 30 minutes. Then place on a well-floured surface. Cut the dough in half and roll out the bottom pie shell first. Place dough in pie pan (or casserole dish) being careful to fill the pan without stretching the dough.

Pour the blueberry mixture into the shell. Drop cubes of butter evenly on top of the fruit and drizzle on the lemon juice. Then roll out the top shell. Drape over the pan and tear away extra dough, leaving 1/2 to 1 inch all around. Seal the top and the bottom shells together as you prefer. I like to gently twist and tuck the dough all around. When it comes out of the oven, the edge resembles a rope circling the pie.

I like to brush butter over the top and sprinkle with sugar. Then bake in a 375-degree oven for 20 minutes. If the crust is browning too quickly, put foil over the edges and cook for another 25 minutes. I checked my pie at that point and decided to add another 10 minutes. It probably needed more time because it was so large. When I pulled it from the oven, it was golden brown and the juices were bubbly.

Pie Dough
3 c. flour
1 Tbsp. sugar
1 tsp. Kosher salt
2 sticks cold unsalted butter, cubed
1/2 cup ice water

In a food processor, pulse the flour, sugar and salt a few times to combine. Then add really cold cubes of butter. Pulse until the mixture looks crumbly – about 12 times. Then drizzle in cold water while continuing to pulse until the dough clumps together. Drop the dough on a floured surface and gently press together to form a ball. Cover with plastic wrap and place in the fridge to rest.

We’ll have the rest of the berries for breakfasts and snacks. But I also really enjoy them in a spinach salad. Adding fruit to greens perks them up and can be a nice change.

Spinach and Berry Salad
5-6 c. fresh spinach, cleaned and torn
1/4 c. olive oil
1/8 c. balsamic vinegar
1/2 Tbsp. honey
Salt and freshly cracked black pepper, to taste
1 c. strawberries, cleaned and halved
1 c. blueberries, rinsed and dried
1 c. pecans

Place spinach in a large bowl. Whisk together olive oil, balsamic vinegar and honey. Pour over spinach and sprinkle with salt and pepper. Toss the spinach with the dressing. Top the salad with strawberries, blueberries and pecans. Shaved pieces of Parmesan cheese also make a nice salty-nutty addition.

*** Quotes from Julia Child ***
“A party without cake is just a meeting.”
“The only time to eat diet food is while you’re waiting for the steak to cook.”
“If you’re afraid of butter, use cream.”
“I think every woman should have a blowtorch.”