Rosemary crusted pork loin – while canning pasta sauce

Pressure canning

Pressure canning is something I have always wanted to do. I’ve pickled vegetables and processed them with the water-bath method, but the ability to preserve food without all the vinegar and salt seemed out of my reach. That is until I purchased a used pressure cooker/canner. What makes it even more interesting to me is that it once belonged to centenarian Hazle Terry. Hopefully, I can do as well with it as she.

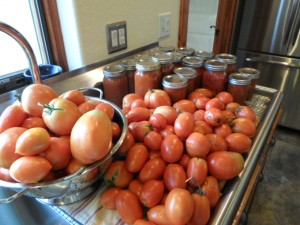
So far I’ve processed tomato quarters and hot salsa. Pasta sauce was next on my list. I knew the effort would take a few hours since I needed to remove the tomato skins by boiling them in water and peeling as well as allowing the tomatoes to simmer with onions, garlic and savory herbs before pressure canning.

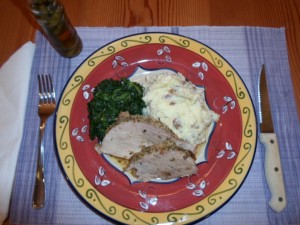
Since I was going to be in the kitchen heating up the house anyway, I decided to cook the huge pork loin my husband picked up when he offered to get the groceries – it’s been a busy week. I was thinking a small one-pound loin would be nice for a dinner, but like most men – go big or go home – he bought almost four pounds of pig. Actually he did very well; it was a beautiful roast.

While water started to boil for the tomatoes, I set the oven for 350 degrees and seared on the stove-top all six sides of the pork loin – that included the ends. Placing the loin in a roasting pan with the fatty side up, I salted and peppered and spread rosemary pesto all over the top of the loin. (Rosemary pesto is a paste made with rosemary, garlic, walnuts, olive oil, parmesan, salt and pepper. Made up in 4-oz. container portions, it can be frozen and used as needed.) I also sprinkled panko bread crumbs on top of the loin and drizzled it with olive oil. It already smelled good.

Because of its size, that loin was going to need to cook for almost two hours. So into the oven with the timer set for 45 minutes. Then I began processing tomatoes. After 45 minutes, I made a tent with foil and placed it loosely over the roast. This keeps a little moisture in and more importantly, keeps the rosemary pesto from browning too much. Back into the oven and set the timer for another 45 minutes.

By this time the tomatoes have been peeled; onion and garlic have sautéed in a huge pot; the pot has been deglazed with a little red wine; herbs, seasonings and tomatoes have been added; and the sauce is simmering nicely. And I needed to decide what to serve with the loin for dinner. Potatoes or rice came to mind and I decide on potatoes since I still had a few left and rice will keep. I made the smashed potato recipe from last week’s Leader and since I had so much going on, I just popped frozen spinach into the microwave. Both are quick and easy.

After the second set of 45 minutes had passed, I pulled out the loin and checked the internal temperature with a meat thermometer. I was looking for 160 degrees and we weren’t there. I ended up cooking the loin for another 30 minutes before reaching 162 degrees. I let the meat rest for about 20 minutes before slicing.

The rosemary pesto and panko bread crumbs made a flavorful crust over the meat that was moist and perfectly seasoned. The smashed potatoes and spinach paired nicely with this incredible roast. I still need to pressure can the jarred pasta sauce and it looks like we’ll be having pork loin for a few more meals.

Pork loin

Steak, smashed potatoes and caprese salad

stk pot caprese

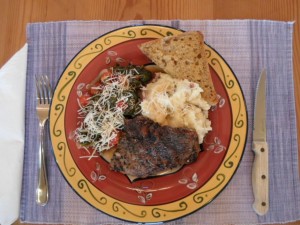
Labor Day and grilling just seem to go together – like meat and potatoes. Labor Day weekend always falls around my husband’s and my anniversary since we were married on September 1. It has been 29 years and we are still celebrating. This year I made steaks on the grill and smashed potatoes with rosemary and garlic. Then I decided to cool things off with my spin on a caprese salad. Caprese (pronounced kah-preeh-zay) salad is made with ripe tomatoes, mozzarella and fresh basil.

The steaks came from trading vegetables with a neighbor who raises Black Angus beef cattle – definitely one of my better trades. Those steaks are so good you don’t need to do anything to them. I let them come to room temperature on a plate with a splash of olive oil, salt and pepper while the grill pre-heated and I started the potatoes boiling.

To make the smashed potatoes, cut skin-on red potatoes into 1-inch cubes, throw in three smashed garlic cloves and a sprig of rosemary. Add just enough cool water to barely cover the potatoes and bring to a boil. As soon as the water boils, add salt, put on the lid and reduce the heat. Simmer for 15 minutes or until the potatoes are fork-tender.

I had a bag of fresh spinach that was going to get slimy if I didn’t use it soon, so I decided it would be part of the salad. First sauté onion and garlic in olive oil – they seem to be part of all my meals anyway. Season with salt, pepper and red pepper flakes. Then add about two cups of cherry tomato halves along with a splash of balsamic vinegar to the pan. I threw in the entire bag of spinach and 1⁄2 cup chopped basil. Toss the ingredients around so the oil and vinegar coat everything. \Put the lid on the pan and turn the heat off, letting it sit to wilt the spinach while working on the rest of dinner. The idea is to have tomatoes that are just heated and spinach that is slightly wilted. Don’t overcook it!

When the potatoes are finished boiling, strain them, remove the stick from the rosemary and let sit while the steaks go on a medium-high heated grill. Be sure to set the timer if you can’t watch the steaks. I usually set the timer for four minutes – it goes by fast and 5 minutes pass by the time I actually go outside and check the grill.
Meanwhile mash the potatoes and heat 1⁄2 stick butter and a cup of buttermilk or fat-free Half&Half in the microwave. It is best to add warm liquids to hot potatoes.
The buzzer is going off, so turn the steaks. Set the timer again – another 4 minutes. Pour the warmed liquid into the potatoes and continue to mash. Add salt, pepper or more liquid until the taste and consistency of the potatoes are perfect.

We like our steaks medium-rare and they are usually ready after 5 minutes on each side. It will depend on the thickness of the steak and cooking preferences. Remove the steaks and let them rest covered with foil for at least 10 minutes. A pat of butter placed on top while it rests makes the steak extra special – especially on an anniversary.

When serving, don’t forget to add shredded mozzarella to the caprese salad. I added a little to the potatoes too. Why not?

Rosemary Bread Recipe

In a large mixing bowl, dissolve 2.5 teaspoons of yeast and 1 tablespoon of sugar into 2 cups warm water. When the yeast mixture is frothy, add 2 cups of flour and stir. Then add 2 teaspoons kosher salt, 2 teaspoons of fresh chopped rosemary and two more cups of flour. Stir until blended – do not knead. Cover with a moist towel and let rise for an hour.

Flour the work surface and scoop the sticky dough out of the bowl and onto the surface. Cut the dough in half and start kneading. I usually end up adding about a half a cup of flour more to each half of dough while kneading. Form two mounds and place them on a cookie sheet that is lightly coated in olive oil and sprinkled with corn meal. Cover with the moist towel and let rise for another hour.

Brush each mound with olive oil and sprinkle lightly with more chopped rosemary and sea salt. Bake in a 425 degree oven for 10 minutes. Then reduce the temperature to 375 degrees and bake for 15 minutes more.

Panzanella

Panzanella

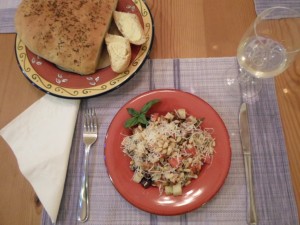
Visiting Tuscany has been a dream for many years. I guess you could say it’s on my bucket list – and it’s not a very long list. In the meantime, I do tend to seek out all things Tuscan, especially in my cooking. This dish is panzanella – a summer salad from Tuscany made with stale bread and tomatoes.

Stale bread doesn’t happen very often at my house. Also since bread is the star of this dish, a tasty rustic bread should be used and it’s even less likely to be found going stale. I made two loaves of rosemary bread I believe to be a Macaroni Grill recipe. One loaf distracts the fellas in my house while I toast or grill the other in an effort to make it more stale-like.

I diced a handful of peperoncini (pickled light-green Italian peppers), a red pepper, 6 medium-sized tomatoes, a small red onion and a cucumber. I placed them in a bowl with about a tablespoon of capers and a cup of chopped Kalamata olives. I picked and chopped a handful each of parsley and basil and added them to the bowl. Then I cubed 8 oz. of fresh mozzarella. It is important to use the fresh; a hunk of processed mozzarella sold in a rectangular brick will not have the same taste or texture. Then cube about half the loaf of stale-like rosemary bread and toss it and everything else in the bowl together.

The dressing is simple. I used 1/3 cup of extra-virgin olive oil, 2 garlic cloves smashed to a pulp (with the help of a little salt and the flat part of a knife) and 3 anchovy fillets. If you feel the need to go vegetarian, skip the anchovy fillets – but I don’t recommend it. Place those ingredients in a microwave-safe dish (like a Pyrex measuring cup) and microwave for 1 minute. Let stand for about 5 minutes.

Then smash the anchovies until they break up in the oil with the garlic. Add about 1/4 cup of balsamic vinegar and then sea salt and freshly ground black pepper, to taste. Whisk it all together, pour over the salad and toss.

The salad should stand for at least 15 minutes to let everything blend well together. It’s a light and easy dinner if you already have the tasty stale bread. Garnish with grated Parmesan cheese and pine nuts. When I take a bite and close my eyes, I feel like I’m in Tuscany.

2013 Lenoir (Black Spanish) Harvest

Lenoir harvest

Last weekend’s unseasonably cool weather was truly a blessing. Especially since my husband and I had two grape harvests to attend. Saturday we harvested south of Tyler and stayed to help process the grapes. Sunday we picked Lenoir grapes at our own vineyard on Della Terra Farm. When volunteers help with the harvest, it is always best to feed them and keep them happy – so they’ll want to help again next year.

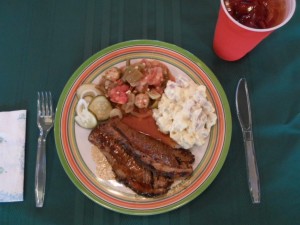
The day of harvest begins before daylight and isn’t finished until all the grapes are in. Feeding the crew requires planning ahead. Saturday night I prepared a brisket for the crock-pot and made potato salad. I also pre-chopped vegetables for an okra Creole.

The brisket preparation was simple. I trimmed away excess fat and cut the brisket in half to make it fit into my extra-large crock-pot. I made a rub of garlic salt, onion powder, chili powder, cracked black pepper, oregano and celery seeds. I made sure both brisket halves were well coated with the rub. Then I squeezed a small amount of barbecue sauce on the top of each brisket and stacked them in the crock-pot. Placing the lid on securely, I set the temperature on low and the cook-time for 8 hours. Off to bed.

The next morning, the house smelled wonderful. I removed the brisket and let it rest on a cutting board while skimming the fat off the juice. I sliced the brisket thinly across the grain. Then laying the pieces in a shallow baking dish, I topped with reserved juices, covered with foil and placed in a warming drawer – or an oven at a low setting. Time to begin the harvest.

A few hours later while the crew cleaned harvesting forks, buckets, loaded the truck, etc., I escaped to the house to get lunch ready. The previous night I had chopped two onions, three green peppers, four garlic cloves, a large batch of okra (whatever I can do to move the okra) and a gallon bag of tomatoes.

At that point I only needed to heat olive oil in a large pot and sauté the onions, green peppers and garlic. Then I added the chopped okra and tomatoes. Be sure to season with Cajun seasoning, salt and pepper. I reduced the heat to low and let simmer while setting the table for the crew. I cooked the okra Creole about 20 minutes or until the okra was tender. Before serving, I added a handful of chopped fresh basil.

Quite honestly, everything tastes better after hard work and a job well done.

Harvest dinner

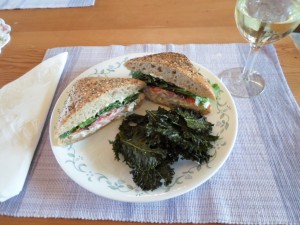
Chicken salad on ciabatta bread with crispy kale chips

Chicken salad and kale chips

The scorching heat has been rough on lawns and gardens. My green beans and squash are finished for the season. Luckily, the tomatoes, okra, cucumbers and kale are still going strong. Kale is a leafy green that is really underappreciated. It is not just for decorating the salad bar. Last week’s recipe utilized it in a stew and this week, I made kale chips to go with chicken salad sandwiches for Sunday afternoon.

I gathered several kale leaves, washed them and laid them out on a towel to dry. Meanwhile I chopped three leftover chicken breasts, two stalks of celery, three green onions, a handful of fresh parsley and about ½ cup of walnuts.

I seasoned with salt, pepper, celery seeds, garlic powder and paprika. I squeezed in ½ tablespoon of Dijon mustard and about a cup of good mayonnaise (never Miracle Whip!). Mix all those items together and refrigerate for a couple of hours.

Heat the oven to 275 degrees. Tear the kale into bite-sized pieces and toss with a little olive oil and sea salt. Be careful not to over-salt. It is surprisingly easy to do; just remember the kale will lose volume in the oven and less salt is needed.

Spread the kale leaves in a single layer on a sheet pan and cook for 20 minutes. Let the leaves cool for about 10 minutes. If they are not crispy, put back in the oven for 5 minutes more.

I toasted multi-grain ciabatta bread and spread mayonnaise on each side. I loaded the chilled chicken salad on one half, then added slices of fresh tomatoes and mixed greens on the other.

I served the sandwiches with a side of crispy kale chips. My husband and I enjoyed them on the back porch as it started to rain, cooling off the afternoon. Life is good.

As a side note, be sure to check your teeth after eating kale chips. You may even want to floss!

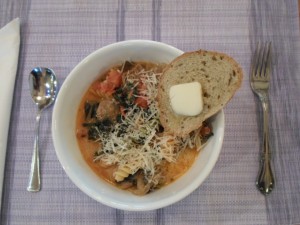
Italian sausage and kale stew

Italian sausage and kale stew

My husband has a bumper sticker on his truck that reads, “I love animals. They are delicious.” As that would indicate, we aren’t vegetarians. However it is important to eat a diet rich in fruits, vegetables and whole grains. I’ve seen David slice a tomato and while adding it to his sandwich, comment that he needs more lycopenes. I wonder where he heard that? He must be paying attention. This week’s dinner is a hearty stew rich with colorful vegetables and whole-grain pasta.

Brown a pound of Italian sausage in a wide pot, turning the links so they brown evenly. Remove to cool. They are not fully cooked and will go back into the pot later. Add olive oil to the pot and sauté a chopped onion, a chopped green pepper, a handful of sliced mushrooms and 2 minced cloves of garlic. When the vegetables begin to brown, add 5-6 chopped tomatoes. Fresh is best, but you can use a 28-oz. can of whole tomatoes in juice instead. Use a spoon to gently loosen brown bits off the bottom of the pot and to break up the tomatoes. Add salt, pepper and a pinch or two of red pepper flakes. Slice the sausage into bite-sized rounds and return to the pot. Reduce the heat, cover and let simmer.

Set water to boil in another pot. Clean a bunch of kale and remove the stems. Tear or chop into smaller pieces – making about 6 cups. Salt the water and add the kale when it comes to a boil. Blanch the kale for 5 minutes. Then remove with a skimmer or slotted spoon and add directly to the sausage mixture. The sauce should have a fair amount of juice – remember this is a stew. If the tomatoes weren’t juicy enough, add a cup of chicken stock.

Using the kale water brought back up to boiling, add a pound of whole grain penne or fusilli pasta. Cook until tender but still firm to the bite, about 8 to 10 minutes. Drain the pasta and after removing the sauce from the heat, add the pasta to the sauce.

Slowly stir in about a cup of fat-free Half-and-Half. The cream will create a rich orange-colored sauce. Taste and adjust seasonings. Let the stew sit allowing the pasta to absorb some of the liquid. Meanwhile grate Parmesan or Romano cheese and slice off a few pieces of crusty bread.

Serve the stew with cheese sprinkled on top and a slice of bread. You can eat this with a fork, but believe me, you’ll want a spoon.

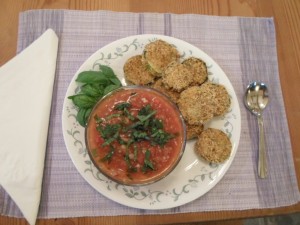
Gazpacho and zucchini chips

Gazpacho

Gazpacho is usually a tomato-based raw vegetable soup served cold. There may be as many variations of this recipe as there are bass in Lake Fork. I’ve even had a melon gazpacho – not my favorite – but it wasn’t bad. My version uses fresh vegetables and it allowed me to process the 6 pounds of tomatoes I picked last week. I made enough for three meals and shared with friends. So, the following recipe is a fourth of what I made and may be better for serving a family of 4.               

Put a pot of water on the stove to boil while you wash about 1-1/2 lbs. of tomatoes. While you are washing, clean a red pepper, a cucumber and a jalapeño too. Back to the tomatoes, cut an X on the bottoms and place in the boiling water for about 30 seconds. Then using tongs or slotted spoon, remove and let cool. You may need to process in a couple of batches, so make sure the water comes to a boil again between the batches.

When the tomatoes are cool enough to handle, peel off the skins and core them. I cut the tomatoes in half along the equator and squeeze them over a bowl to get out most of the seeds. That seeds them well enough for me, but maybe not for someone with diverticulitis. During this process, make sure you are saving the tomato juice since you are going to need about a cup.                         

Chop the tomatoes, seeded red pepper, peeled and seeded cucumber and 1 red onion into 1/4-inch cubes and place into a large bowl. Hopefully you have about a cup of strained tomato juice left from peeling and seeding the tomatoes. If not, add store-bought tomato or vegetable juice to the fresh juice, making a cup, and add to the bowl. Then mince a seeded jalapeño and garlic clove, adding them to the bowl. 

Pour in 1⁄4 cup extra-virgin olive oil, the juice from 1 lime, a splash of balsamic vinegar and Worcestershire sauce. Season with a little cumin, freshly ground black pepper and kosher salt. Stir everything together and taste. I usually end up adding more balsamic vinegar and salt. If you like it hot, consider adding Louisiana Hot Sauce or Tabasco.

Scoop at least half the mixture into a food processor and purée. Add back to the bowl, cover and refrigerate for a few hours or as long as overnight. When ready to serve, chop up fresh basil and sprinkle over the top of each bowl.

I made zucchini chips to go along with the gazpacho. Slice a few zucchini about 1⁄4-inch thick. Toss the chips in flour. Whisk two eggs and about 1⁄4 cup milk together. Toss the flour-dredged chips in the egg mixture until all are coated. 

Then toss this in seasoned bread crumbs. Be sure to sample the bread crumbs first and add seasonings until you are happy with the taste. Store-bought bread crumbs may not have the seasonings you like and may not have enough salt. I really like plain Panko bread crumbs with my own seasonings. Lay the coated chips in a single layer on a lightly greased pan. Bake in a 450-degree oven for 25-30 minutes.

Baked chips and cold vegetable soup are a treat on a hot summer evening.

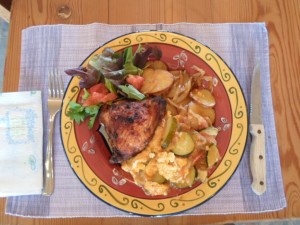
Chicken, potatoes and zucchini gratin

Chicken dinner

I have found a winner of a chicken dinner. It’s not low-fat, but it’s made with fresh ingredients, and a little fat now and then isn’t a bad thing. I bought a whole chicken and cut it up into 8 pieces – two breasts, two wings, two thighs and two drumsticks. I saved the rest of the chicken in a freezer bag. When I get enough miscellaneous parts saved, I like to make chicken stock. You can also purchase bone-in, skin-on chicken pieces for this dish.

In a bowl large enough to hold all the chicken pieces, I mixed 2 tablespoons smoked paprika, 1 tablespoon chili powder, 1 teaspoons kosher salt, about 1/4 teaspoon black pepper and 1 tablespoon olive oil. With clean hands, add the chicken pieces and toss around, rubbing until the mixture coats every piece of chicken.

Wash hands well and set the oven to 375 degrees. Let the chicken sit in the bowl on the counter while you prepare the potatoes, onions and garlic.

I was lucky enough to trade some of my zucchini and cucumber abundance to a neighbor for their beautiful freshly harvested new potatoes. I washed 2-3 lbs. of the potatoes and sliced them thinly – between 1/8 – 1/4 inch slices. Then I chopped an onion and minced three garlic cloves.

This next part is very important for a successful dish. You’ll need a sheet pan with sides and a rack – a cooling rack or the rack from a roaster will work. Cover the sheet pan with foil and lightly grease with cooking spray. Arrange the potatoes, onions and garlic in an even layer on the pan and sprinkle with 1 teaspoon salt. Lay chicken pieces skin-side up on the rack and set the rack over the potatoes and onions on the sheet pan.

Bake until the skin is crispy and the potatoes are tender, about 55 to 60 minutes. For more crispy potatoes, remove the rack with the chicken and continue baking the potatoes for another 10 minutes.

The moisture from the potatoes and onions keeps the chicken from drying out and the chicken drippings flavor the potatoes and onions below. I served this dish with a baked zucchini gratin and a side salad.

Zucchini Gratin

This next recipe is great for using those larger zucchini. I had two large ones – over 10 inches – and three regular sized – about six inches. I washed them, sliced each in half and cut across into half-moon slices about 1/4 inch thick. I chopped one large onion, minced three garlic cloves and two garden tomatoes.

Heat 1 tablespoon olive oil and 1 tablespoon butter in a pan and sauté all the vegetables until they are just tender. Lightly salt and pepper the vegetables, add a teaspoon of dried thyme and 3 tablespoons of flour. Stir until the flour is incorporated. Remove from heat.

Spray a casserole dish with cooking spray and add the vegetable mixture. In a small bowl, mix together 2 eggs, 1 tablespoon brown sugar and 1/2 cup milk. Pour over the vegetables and top the casserole with a cup of grated cheese. I used mild cheddar.

I placed the casserole in the oven and baked it along with the chicken and potatoes for the last 30 minutes.

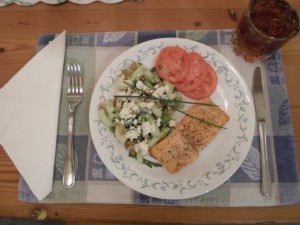
Baked salmon and cucumber salad

Baked salmon and cuc salad

This past Saturday I worked outside in the vineyard the whole day. When I came in at 6:30, I was hot, tired, and dirty. I needed to make something for dinner, but it had to be quick, light and cool. Baked salmon with cucumber salad fit the bill and made my family happy.

I pulled out salmon fillets to thaw while I hit the shower. Feeling human again, I returned to the kitchen and cranked the oven up to 450 degrees. Normally I like to grill salmon, but the house was cool and the back porch was not. I patted the salmon fillets dry with a paper towel and lightly seasoned them with olive oil, salt and pepper. I placed them on a foil-lined baking dish and put it in the oven as soon as it came to temperature, setting the timer for 15 minutes.

While the salmon baked, I prepared the cucumber salad. I used 4 large pickling cucumbers. They are large because they hid from me for a few days when I was gathering in the garden. I peeled the cukes, cut them in half and scooped out the seeds. I chopped the cukes and three stalks of celery into bite-sized pieces. I usually include a few celery leaves because they look nice and then threw everything into a salad bowl.

I wanted to add chives to the salad and honestly wasn’t sure I had any. The grasshoppers have really made a mess of the herbs. I transplanted fennel in the herb garden and they really seem to love it! Despite the fact that I was clean and it was hot outside, I decided to hunt for chives. The herb bushes jumped with grasshoppers, but I pressed on moving aside a huge fennel frond. I found bright green chives untouched by the hoppers and picked a handful. I minced about 2 tablespoons of chives and added them to the salad bowl.

I coarsely chopped about a cup of walnuts and threw in 2 handfuls of golden raisins. Pecans or Craisins would also work well instead of walnuts or raisins, but I used what I had. Then I whisked together the juice of one lemon, a splash of white balsamic vinegar, about 1/3 cup olive oil, salt and pepper.

By that time, the salmon was done. I pulled it from the oven and let it rest a few minutes before serving. I dressed the salad and placed a generous portion on each plate with crumbled feta cheese on top. I delivered the salmon to each plate and garnished with tomato slices.

Dinner was simple, quick and delicious. The leftover salad made a nice light lunch the next day.