More squash – Sweet & Spicy Pickled Squash

Zucchini

I didn’t sell at the farmers’ market last weekend because my 5-year-old nieces came to visit. We visited the garden daily and picked whatever was ready. We shelled the last of the English peas and we made butter from cream we purchased locally.

For dinner we had peas and squash with the homemade butter. There’s still a lot of squash so I’ll pickle some. Carrots and cauliflower may also be added to this recipe and it is great served with fish.

Sweet and Spicy Pickled Squash
3 lbs. squash (yellow and zucchini), sliced
2 cups onions, sliced
Pickling salt, for sprinkling (about 1⁄2 cup)
6 cups water
3 cups white vinegar
1 1⁄2 cup apple cider vinegar
3 cups sugar
2 Tbsp. mustard seeds
1⁄2 tsp. turmeric
4 cloves
1 large head garlic, skinned and roughly chopped
1 cup hot peppers (I use jalapenos that have turned red), sliced

Layer squash and onion in a large glass bowl, sprinkling the layers with salt and pour the water over all. Let soak for 2 hours. Drain the salt liquid from the vegetables and rinse well. Spread the vegetables out on clean towels and let dry while preparing pickling liquid.

Combine vinegars, sugar, mustard seeds, cloves, garlic and peppers in a pan and bring to a boil. Reduce heat and add vegetables. Bring to a simmer and then remove from heat.

Fill sterile pint-sized jars with the mixture, making sure the liquid is 1⁄2-inch from the top. Wipe the rim with a clean towel and fit with a hot lid. Screw on the metal ring. Process the jars in a hot-water bath for 15 minutes.

Remove jars and let cool. Test the seals. Store the pickles for a least two weeks before serving. Refrigerate any jars that did not seal well.

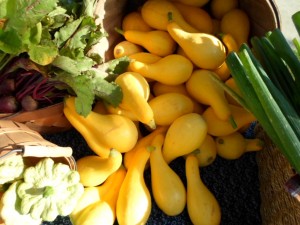
We also picked scalloped or patty-pan squash. My favorite way to cook those is to slice them in 1⁄2-inch cross sections and marinate them for a few hours in balsamic vinegar, olive oil, salt, pepper and steak rub. Then place them on a hot grill just long enough to leave grill marks. Serve them on toasted buns with the usual hamburger fixings.

Squash is in season!

Market Squash

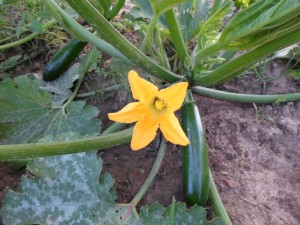
Now that the days are warming up, yellow squash is growing very well in my garden. Based on other vendor booths at the farmers’ markets, I’d say it is growing well for them too. Most individuals who planted squash in the home garden find that it produces more than they can consume. That’s good because friends and neighbors usually benefit as well. A friend told me that Texas is the only place she’s had someone break into her vehicle and leave something instead of taking something. They left squash.

Squash is great picked young, chopped and eaten raw in a garden salad. It is certainly good boiled in salted water and then served with a small amount of real butter. I like to lightly toss it with other vegetables in olive oil, salt, pepper and thyme or rosemary and then oven-roast it. Try it on the grill when grilling hamburgers and serve it as a side instead of French fries. Mmmm, now I’m getting hungry for a veggie panini sandwich.

Before I get too carried away with all the ways to use squash, my favorite recipe, one that freezes well too, is squash casserole. The recipe is similar to one served at The Black-eyed Pea, but of course I’ve modified it a little. I’ve reduced the sugar and added freshly chopped thyme. The recipe serves 6, and each serving has 146 calories and 5 grams of fat. Served with a lean meat and side salad dressed with lemon juice, it is a great healthy meal.

Squash Casserole
2 lbs. yellow squash
1 Tbsp. butter, softened
1 cup bread crumbs, divided
1 Tbsp. sugar
1⁄2 tsp. salt
1 tsp. fresh thyme, chopped
1 Tbsp. dehydrated onion
2 ea. eggs
1 pinch pepper

Wash and cut squash into 2” cubes and cook in lightly salted boiling water until done. Drain well, mash and continue to drain for about 10 minutes.

In a bowl, combine all the ingredients except for half of the bread crumbs. Place mixture in a lightly greased 2-quart casserole dish. Top with the remaining bread crumbs.

Bake covered in a 350-degree oven for 20 minutes. Uncover and bake for about 10 minutes more or until the crumbs on top are lightly browned.

Using dehydrated onions is important as they help absorb liquid. If using fresh onions, make sure the squash has drained really well or else the casserole won’t set – I’m sure it will still taste good.

Next week I’ll share a pickled squash recipe. There are just too many recipes for squash to fit them all in this article.

Wheat Pasta with Beefy Tomato Sauce

Wheat pasta

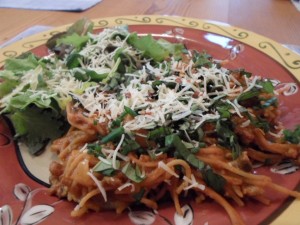
I am a pasta lover. In my 30s, I ran 36 miles a week and practiced karate 3 times a week. I could eat anything I wanted. Now, 20 years later, I don’t run – unless I’m being chased – and I try to remember to practice Yoga. I have to watch what I eat, but I still crave pasta. I get my carb-fix with whole wheat pasta cooked in a beefy tomato sauce.

Whole Wheat Pasta in Beefy Tomato Sauce
1 lb. extra lean ground beef
1 cup baby portabella mushrooms, sliced
1 medium onion, chopped
2 cloves garlic, minced
8 cups chicken broth
1 12-oz can tomato paste
2 tsp. dried oregano
1 tsp. dried basil
1 12-oz box wheat spaghetti
1⁄2 cup Parmesan cheese
Salt and pepper to taste
Fresh herbs for garnish

Cook meat and onions in a large pot until the meat is brown and the onions are tender. I added a little salt and pepper during that process. Then add the mushrooms and garlic and cook for about 5 minutes. Stir in broth, tomato paste and dried herbs.

Break the spaghetti noodles into approximately 2-inch pieces. (Most Italians would frown on that step, but it helps incorporate the pasta into the dish. It also makes the meal kid-friendly.)

Add broken pasta to the pot and stir. Bring contents to a boil, reduce heat and simmer for about 20 minutes. Stir occasionally and add a little water if necessary.

I served with mixed garden greens dressed lightly with lemon juice. Then I sprinkled chopped fresh parsley, chives and basil and about 1/8 cup of parmesan over all.

Only one pot needed washing after the making of that meal, so clean-up was quick. The recipe served 8, and each serving had 365 calories and 13 grams of fat.

Sauteed Rapini (also known as broccoli rabe)

Rapini

Local gardens are spilling over with fresh greens this time of year and farmers’ markets are doing good business. I have a booth at the Sunrise Market in Sulphur Springs, selling fresh produce, eggs and homemade bread. Despite the rain last Saturday, we had a good turnout.
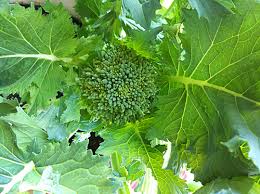
Rapini, also known as broccoli rabe, is a leafy green with small spikes of broccoli-like clusters. I sold several bunches of rapini at the market and gathered more for dinner on Sunday.

Sautéed Rapini
1 bunch of broccoli rabe, cleaned and tough stems removed
1 Tbsp. olive oil
2 tsp. garlic, minced
1 pinch red pepper flakes
Salt to taste

Blanch the broccoli rabe in boiling salted water for one minute. Remove and immediately plunge into ice water. Once cooled, drain and let dry.

Bring olive oil to medium-high heat in a sauce pan. Add garlic and red paper flakes. Cook for about a minute and add the broccoli rabe. Toss around in the oil. Turn the heat to low and cover pan with a lid. Cook for 5 more minutes. Taste and season with more salt, if necessary.

Sunday dinner consisted of a huge leafy green salad, with sweet radishes (tender leaves included), young peas, onions, asparagus and rapini, all from my garden. I added store-bought tomatoes and avocado as well as a chopped boiled egg laid by one of my chickens.

The salad was dressed with a concoction I made of equal parts oil and red wine vinegar, and to that I add a small amount of Dijon mustard, fresh chopped herbs, minced garlic, salt and pepper. Refrigerate the dressing in a glass jar and just give it a good shake before using.

Support the local farmers’ markets and eat healthy.

Catfish Fillets with Baked Sweet Potatoes and Greens

Catfish

While I haven’t fished lately, just don’t have the time, I think the key to catching fish is being able to think like a fish. Sometimes you also need to think like the bait. My biggest catch was made in a small pond outside Miller Grove. I remember telling myself to “be the sluggo.” I concentrated on guiding the lure to mimic the movements I imagined that creature would make in the water. It worked!

Cleaning fish doesn’t bother me. That is with the exception of catfish – one of God’s more bizarre-looking creatures. I am more than happy to leave that chore to others. So I was really pleased when a friend brought over two gallon-sized freezer bags of catfish fillets. One went into the freezer and the other was that night’s dinner.

Catfish Fillets with Sweet Potatoes and Fresh Greens
Catfish fillets
1 small onion, sliced
2 Tbsp. dill weed, roughly chopped
1⁄2 cup fat-free yogurt
1⁄2 cup fat-free cottage cheese, puréed
1 Tbsp. chives, finely chopped
Small sweet potatoes, peeled
Garlic cloves, slivered
Salad greens
Fresh baby sweet peas
1 lemon, juiced
Salt and pepper to taste

Preheat the oven to 400 degrees. Cut across the sweet potatoes without slicing all the way through. Place potatoes on a baking sheet. Insert a sliver of garlic in each cut, lightly mist with olive oil and add salt and pepper. Bake for 40 minutes.

Prepare a pouch with a large piece of foil. Spray olive oil on the bottom and place fillets in a single layer with onion and dill on top. Lightly add salt and pepper and seal the foil pouch. Place in a baking dish and bake with the potatoes for the last 20 minutes.

Mix yogurt and puréed cottage cheese with a little salt, pepper and chives. That can be used like tarter sauce with the fish as well as a dip for the potatoes.

Sweet peas are still producing in my garden. I like to pick them early and we eat them raw in salads. Prepare a simple salad with micro-greens and peas.

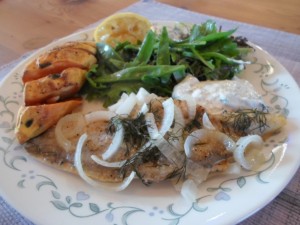
Each serving consists of a 4-oz. catfish fillet, a small sweet potato, yogurt-cottage cheese sauce, fresh greens and peas. Garnish with freshly squeezed lemon juice. Each serving is about 259 calories with 6 grams of fat.

Salmon Patties

salmon patties

The vineyard is starting to green-up again after April’s frost damage. Over the weekend we pulled the last of the trellis wires over the two-year-old vines, so everything is ready to flourish. The herb garden is also thriving and Sunday afternoon was spent weeding and cleaning that patch. It was a beautiful weekend and a lovely Mother’s Day.

My boys served hamburgers cooked on the grill and baked baby potatoes for dinner on Sunday. I made it diet-friendly by placing my patty on a thin whole wheat roll with onions, lettuce and mustard. Just a dash of garlic salt seasoned the potatoes. It was a minor diet divergence, but I had been good all week.

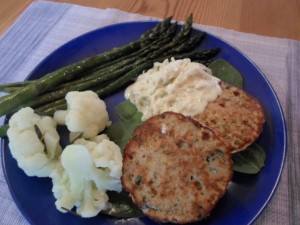
One low-fat dinner that came out really well was the salmon patties served with fresh vegetables and a dollop of yogurt sauce. I’m not a big fan of canned meats, but I bought canned salmon. The can was a dollar more than the other brands and I hoped that would imply fewer bones to pick and discard. Unfortunately, that wasn’t the case.

Salmon Patties
16-oz canned salmon, picked for bones
1 small onion, diced
1⁄4 cup bread crumbs
4 egg whites
1 tsp. lemon juice
1 Tbsp. parsley, chopped
1 pinch salt and pepper

Preheat oven to 400 degrees. Combine all ingredients. Form 8 patties and place on a pan sprayed with cooking oil. (I placed mine on a Silpat mat and no oil was needed.) Cook for 15 minutes until brown.

I had a bunch of asparagus spears ready with a light spray of olive oil and a dash of garlic salt and placed them in the oven for 10 minutes. I also steamed a head of cauliflower with a sprig of rosemary while the patties and asparagus cooked.

I love tartar sauce with fish, but instead I added about a quarter cup of chopped cucumber and 1 chopped green onion to a cup of fat-free Greek yogurt. I added a dash of salt, a tsp. of honey and 1⁄2 Tbsp. of chopped fresh dill.

With two patties per serving, the dinner feeds four. Each serving had 268 calories and 8 grams of fat.

That dinner didn’t seem like diet-food. Perhaps I’m just getting used to less fat. The next day for lunch I had a cold salmon patty with mustard on wheat bread with lettuce and tomato slices. The patties are great served hot or cold.

Tuna Steak With Greens

Tuna Steak1

Other than onions, I planted my garden after the Easter weekend. I normally plant in mid-April, but the late freeze discouraged me and I decided to wait. That same late freeze damaged my grapevines. I’m just now beginning to see the vineyard start to green up again.

With the first buds gone, I’m expecting the second budding to produce a significant drop in fruit. That means this season, I’ll have more foliage to manage with less grapes to show for it.

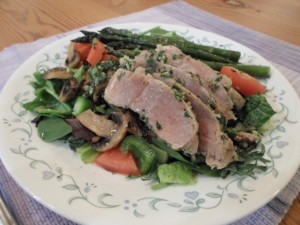
Spring is a very busy time on my little farm, so I try to keep dinners easy, quick and healthy. Last weekend I made tuna steaks served with fresh vegetables and salad greens.

Tuna Steaks with Greens
1-1/2 lbs. tuna steaks
2 tsp. lemon zest
1 Tbsp. rosemary, minced
1 cup parsley, finely chopped
3 tsp. garlic, minced
1 Tbsp. olive oil, divided
1 bunch asparagus spears
8 button mushrooms, sliced
1 head romaine lettuce
1 handful mixed salad greens
1 tomato, chopped
1 lemon, juiced
Salt and pepper to taste

Preheat oven to 450 degrees. Wash asparagus and trim ends. Clean button mushrooms and slice. Drizzle about 2 tsp. olive oil over all. Season lightly with salt and pepper. Toss to coat. Bake for 10 minutes, flipping and tossing the vegetables halfway through the cook time. Remove and let cool.

Mix together lemon zest, rosemary, parsley, garlic, 1 tsp. salt, 1⁄2 tsp. pepper and 1 tsp. olive oil. Spread mixture on both sides of the tuna steaks and place in an oven-safe baking dish. Cook for 8-12 minutes.

My advice if the tuna steaks are fresh and a pink middle is preferred, bake 4 minutes per half-inch thickness. If the steaks were frozen and thawed, cook 6 minutes per half-inch thickness. My steaks were frozen and about an inch thick. I cooked for 10 minutes. There is no need to flip the steaks halfway through the cooking time.

Toss together torn romaine leaves and mixed greens. Serve by laying a bed of greens on each plate. Place the asparagus spears, mushroom slices and chopped tomato on the plates. Lay 4 ozs. of sliced tuna steaks on top of each. Squeezed lemon juice, the juices from the roasted vegetables and tuna provide the dressing for the greens.

This recipe serves 6. Each serving contains 232 calories and 8 grams of fat. Salmon fillets could be substituted for tuna.

Low-fat Tuscan Chicken

Tuscan Chicken

I’ve gained a little weight over the last few years. I’m sure I could blame it on turning 50 and a slowing metabolism. I could argue that life is short and we should eat the butter. Goodness knows I love to cook and love to eat. However, I’m not happy that I have what a friend of mine refers to as “the bigness.” So I’m taking a closer look at how I cook and what I’m eating.

I don’t believe in unrealistic or faddish diets. I just want to drastically cut down on my fat intake and switch to healthier carbohydrates. This week’s recipe serves six and each serving has 455 calories and 4 grams of fat.

Tuscan Chicken
4 boneless skinless chicken breasts
1 tsp. canola oil
2 medium onions, chopped
2 red or green bell peppers, chopped
2 cloves garlic, minced
2 tsp. dried oregano
1 28-oz. can tomatoes
2/3 cup red wine
1 16-oz. can cannelini beans, drained
1 15.5-oz. can red kidney beans, drained
½ cup bread crumbs
Salt and pepper to taste

Cut the chicken breast into bite-sized pieces. Heat oil in a non-stick pan and cook chicken until it is no longer pink. Remove from pan.

Cook onions and pepper in the chicken juices – don’t forget to add salt and pepper. Add garlic and oregano. Cook for a few minutes and add tomatoes, wine and cooked chicken.
Bring to a boil and then reduce heat to low. Cover and simmer for 30 minutes stirring occasionally.

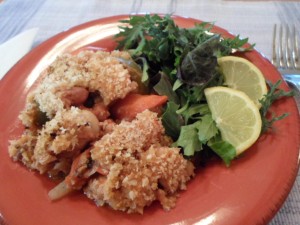
Add beans and cook an additional 5 minutes. Taste and adjust seasonings. Then pour contents into an oven-safe dish. Sprinkle the top with bread crumbs and place in an oven set to broil until browned. Watch closely and don’t let it burn.

I served with a side of fresh herb mixed greens and baby kale. Instead of salad dressing, I squeezed the juice of a lemon slice over the top.

In all honesty, I missed the fat. But that being said, dinner was tasty and I felt satisfied. I’m sure in time I’ll get used to less fat and enjoy the benefits of a smaller waistline.

Easter …and leftovers

Tomato soup

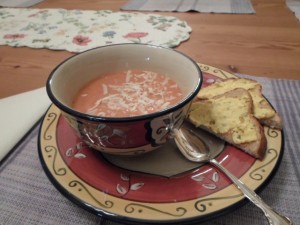
My twin five-year-old nieces came to stay with us for Easter. Yes, my sister and her husband were there too, but the twins usually steal the show. We stayed very busy with a tea party, making table decorations and checking on the chickens. We visited the coop two, sometimes three times a day – just in case there might be a new egg. We decorated eggs and we ate eggs. For dinner Friday night we made every kid’s favorite, tomato soup and grilled cheese sandwiches.

Easter Sunday was quite a bustle of activity with getting ready for the family dinner, setting up tables and chairs, placing decorations, lots of cooking and then dressing up in our Easter best. The little girls looked like fairy princesses in their fluffy tutu dresses and hair bows. We had 30 guests for dinner with everyone bringing something to share. Afterward, the bunny made his delivery while the kids were distracted on the back porch with bubbles.

In the evening after everyone had gone home, the food was put away, dishes were washed up and furniture was back in place, my husband and I relaxed on the back porch. Actually we were so tired we couldn’t move. The quiet after a family get-together is certainly nice.

Leftovers are an added bonus after a big holiday dinner. Since they may last all week, some creativity will be required to keep supper interesting. However, that night we just had leftover tomato soup with egg salad on toast.

Tomato Soup
1 large onion, chopped
1 Tbsp. olive oil
1 tsp. dried basil
1 6-oz. can of tomato paste
2 cloves garlic, minced
4 cups stock
2 32-oz. cans whole tomatoes
2 cups cream
Salt and pepper to taste

In a large pot, cook onions in olive oil seasoned with basil, salt and pepper. I prefer to cook them low and slow until they are a rich caramel color. It takes at least 20 minutes. Then add tomato paste and garlic, turn up the heat to medium-high and continue to cook about 5 more minutes. Add stock to deglaze the pan.

Add the canned whole tomatoes with their juice. Increase the heat and bring to a low boil. Then reduce to a simmer and cook for 20-30 minutes, stirring occasionally. Pull out the immersion blender and process until smooth.

Just before serving, stir in cream and adjust seasonings. Garnish with chopped fresh basil or chives, grated Parmesan cheese or one of those chopped boiled eggs.

Stuffed Peppers

Stuffed Peppers

I love cooking with fresh ingredients. Last week green peppers were calling to me in the produce section, so I bought four.

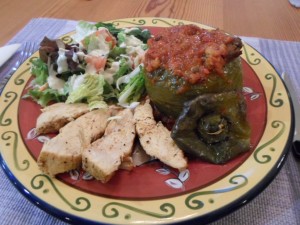
After spring cleaning, I found pantry items that needed used. I’m too frugal to throw anything away. I had canned salsa from last fall and an old box of stuffing mix. Who knows where the stuffing mix came from, but it won’t be wasted. I made stuffed green peppers to go with chicken breasts and salad.

Stuffed Green Peppers
1 onion, diced
1⁄2 Tbsp. olive oil
1 pint salsa or canned roasted tomatoes, divided
1 box stuffing mix
2-1/2 cups chicken stock, divided
2 Tbsp. butter

Drizzle a little olive oil in an oven-safe dish. Cut off the tops of the green peppers and reserve. Clean out the seeds and ribs. Set the peppers into the dish and rub the exteriors with olive oil.

Sauté the onions in olive oil. Then add 1 cup salsa, stuffing mix, butter and 1-1⁄2 cup stock, mixing together until well incorporated. Spoon the mixture into the green peppers. Put the tops back on the stuffed peppers.
Mix the remaining salsa and stock together and pour over the peppers. Cover and cook in a 375-degree oven for 45 minutes.

While the peppers cooked, I seasoned boneless skinless chicken breasts with salt, pepper and chili powder. I seared each side in olive oil in an oven-safe pan. Covered with a lid and placed in the oven with the peppers for the remaining 25 minutes.

While those dishes finished, I prepared a simple side salad. Dinner was really tasty. It looked complex, but was very simple. In fact it was pretty filling so I ended up eating only half the pepper and saving the rest for lunch the next day.