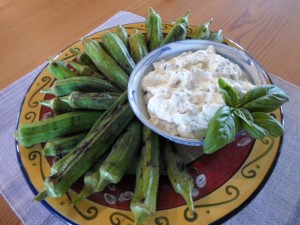
Grilled Okra with Lemony-Basil Dip

Grilled Okra

Last weekend we harvested grapes for friends in Tyler and we had a harvest of our own. The green beetles have really been voracious eaters this year. If we had picked a week earlier, I’m sure we’d have harvested twice the grapes. It felt like we were racing the beetles to get to the fruit first.

Meager as the harvest was, it is always a relief to have it finished. Now I can catch up on all the other work that needs to be done. I can work on my garden again and get it ready for fall. I can tend to my flowerbeds that have overgrown with weeds. I’m also dreaming of cooler days that are perhaps a little less hectic.

Enough dreaming, so I kicked off fermentation on my red grapes. Punching down the cap at least twice each day adds air into the must (very early wine with skins, seeds, etc.) which helps the yeast do its job. Also keeping the skins mixed into the must brings out more color and flavor. By this time next week, we’ll have begun the malolactic fermentation, converting malic acid in the must to lactic acid and thereby reducing the acidity.

It seems that while some things may be winding down, others are just getting started. Clearly okra is doing well in the heat. We pick almost every day and have to throw out okra that is too large and woody because we either skipped a day or didn’t see it. I have many recipes for okra, but stumbled across one for an hors d’oeuvres or appetizer.

Can you imagine serving okra and a dip at a party or even to the gang watching football? The recipe brings out the snazzy side of okra and dresses it up with a lemony-basil dip.

Lemony-Basil Dip
32-oz. container yogurt, strained
1/3 cup fresh basil, chopped
1 lemon zested and juiced
3 cloves garlic, minced
1⁄2 tsp. sugar
1-1/2 tsp. salt
1⁄4 tsp. pepper

Place several layers of cheese cloth (or a large coffee filter) in a strainer and place over a bowl. Pour yogurt in and let it strain in the refrigerator for up to 24 hours. Then add the remaining ingredients, stir well and chill before serving.

Grilled Okra
2 lbs. small okra, cleaned
1-1/2 or 2 Tbsp. olive oil
1 tsp. salt
1/4 tsp. pepper

Toss the okra in olive oil, salt and pepper. Grill over medium-high heat for about 3 minutes on each side. Let cool and serve with chilled lemony-basil dip.

I love snacking on fried okra and the grilled version tastes just as good, and it’s better for you. The dip is low-calorie, tasty and fresh. I would certainly serve this at a get-together instead of fatty fried chips and dip. Hmmm, is that why no one comes over?

Black-eyed, purple-hull and pink-eyed peas

purplehull peas

Black-eyed peas are often eaten on New Year’s Day to bring good luck. They are usually served with greens and cornbread, representing money and gold. The protein-rich legumes in that pea family are a good source of soluble fiber, and contain vital nutrients of B vitamins, vitamin E and iron.

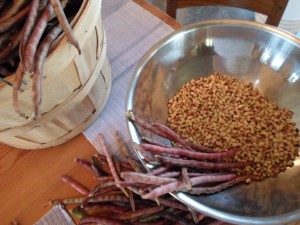
I grow purple-hull peas, a variety of the black-eyed, in my garden. I don’t remember how many seeds I planted, but I sowed 8 rows, 4 feet apart. I thought that would keep a path for easier picking, but I was wrong. They are so large they meet in the middle of each path. I can’t keep up with picking or shelling.

I sold peas last weekend at the Sunrise Market in Sulphur Springs, gave a few pounds to family members, put away nine pounds in my freezer and had them for dinner on Sunday night. Driving by the garden Monday morning, I saw purple pods everywhere, needing to be picked. Plant those peas and your family will not go hungry!

I like to sauté chopped onion, green pepper and garlic while browning about 4 slices of chopped bacon. Then I add peas to the pot and cover with water. Adding a couple of bay leaves to anything cooked low and slow is also a good idea. Once the water boils, I turn the heat down to a simmer, cover and cook for about an hour. I don’t like the peas to over-cook, so I start tasting them about 45 minutes into the cooking process, while adding salt and pepper.

Sunday’s dinner also included oven-roasted okra and sweet potatoes, both from the garden. With 3 pounds of cooked peas, I planned on leftovers. Those are wonderful in a marinated salad. The great thing about the salad is there are many variations and a cook can substitute with ingredients on-hand.

Marinated Pea Salad
4 cups cooked black-eyed or purple-hull peas
4 slices bacon, cooked and crumbled
1⁄2 cup red wine vinegar
1⁄2 cup olive oil
1⁄2 medium red onion, chopped
1 red bell pepper, chopped
3 green onions chopped
2 jalapeños, minced
1 bunch parsley, chopped
2 garlic cloves, minced
1⁄2 Tbsp. Creole seasoning
Salt and pepper to taste

Mix all ingredients together and refrigerate for at least 4 hours; however overnight is best. Remove from the refrigerator, stir and let sit 30 minutes before serving. Sometimes I add chopped avocado, fried okra, tomatoes and/or cilantro as a garnish.

With pea production at its height, I’m in need of a pea sheller. I just don’t have hours to commit to that process. In fact, the only time I sit that long might be during a Sunday morning service. I’m pretty sure some would frown upon my shelling peas during the sermon. If you have a sheller and are looking to get rid of it, I’m interested.

Quesadillas with Refried Beans and Pico de Gallo

Quesidillas

August can be a really rough time of year for folks who work outside. I personally am afraid to work in the garden or vineyard after 12:00 noon, since spontaneous combustion is very probable. Seriously, reality is that the unusually cool and rainy weather in July has made it hard for me to get used to the summer heat.

Vineyards in Northeast Texas are also suffering from the unusual July. If the mid-April frost that killed off blooms wasn’t enough, now the grape clusters are bursting with too much moisture, and they are rotting on the vine. Add the usual June- and green-beetles to the mix, and you have very poor harvests all around. I heard one of the local wineries is absolutely “trolling” for grapes. Wish I could help them, but I’m in the same boat.

Luckily my chickens are still laying (less, but still laying) and my garden is still producing. Those two are more financially solid than the grapes. What’s up with that? Lesson learned, specialty crops have their ups and downs, but the basics carry you through. I’m adding more hens next year!

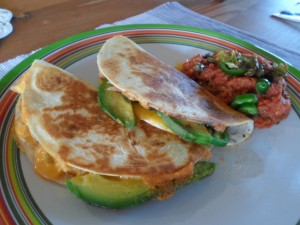
As I work picking the different vineyards’ harvests with which I’m associated, our family dinners are simpler. I can’t wait for September and grape-harvest season in Texas to be over. We may make some wine, but wine-grape jam is sounding pretty good too. In the meantime, refried-bean quesadillas with pico de gallo makes a great quick dinner.

Quesadillas with Refried Beans and Pico de Gallo.
8 tortillas (flour or wheat)
1⁄2 can fat-free refried beans
1 small onion, chopped
2 mild chili peppers, chopped
1 avocado, sliced
6 oz. cheese, grated
Butter or cooking spray

Melt a small amount of butter in a frying pan or coat with cooking spray. Turn heat to low and let the pan heat up while you prepare the quesadilla. Spread half of two tortillas with refried beans. Sprinkle chopped onions, peppers, avocado and cheese over the beans. Fold the tortillas over and lay them side by side in the hot pan. Pay close attention and don’t let them burn. Check by lifting up an edge. When the tortillas are golden brown, it is time to flip.

Continue making the quesadillas two at a time. Usually each family member stuffs the tortillas choosing the fillings. I usually slice a jalapeño for mine. There are at least 4 servings and I garnish with sour cream, salsa or pico de gallo.

Pico de Gallo
2 large tomatoes, chopped
1 medium onion, chopped
1 green pepper, chopped
1 jalapeño, chopped
2 cloves garlic, minced
1 bunch cilantro, chopped
1 lemon or lime juiced
Salt and pepper to taste.

Combine all ingredients and refrigerate for at least 30 minutes before serving. Turn up the heat by adding another jalapeño – I usually do.

Italian Meatloaf with mashed potatoes

Italian meatloaf

While cleaning the fridge last weekend, I found the leftover panzanella salad from a previous dinner using basil, parsley, tomatoes, peppers and cucumbers from my garden. I had added onions, garlic, mozzarella, olives and capers along with leftover French bread from another night’s dinner. By then the bread was soggy and the salad most likely wouldn’t be eaten. I realized that except for the cucumbers, those leftovers would make a fantastic Italian meatloaf.

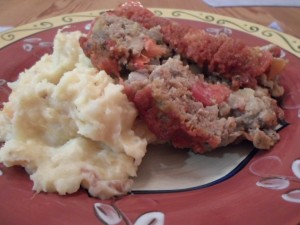
Strange but true, I picked out the cucumbers and threw them in the compost bowl while removing the soggy bread to a smaller bowl where I broke it up and added 1 egg. That mixture went back into the remaining panzanella ingredients along with 1-1/2 pounds of ground meat. I mixed it all together and shaped it into a loaf topping it with tomato salsa spruced up with a little Worcestershire sauce and tomato paste. It baked for 50 minutes in a 350-degree oven.

While the meatloaf cooked, I boiled about 2 pounds red potatoes, one large peeled sweet potato from my garden and 6 garlic cloves in salty water for 15 minutes. I mashed them with a little leftover goat cheese and heavy cream – we were out of butter and my goal was to clean out the fridge.

As I was writing this, I realized that dinner sounded like something from a Chopped episode where cooks have to create a meal from miscellaneous ingredients. Regardless, the Italian meatloaf served over creamy mashed potatoes was fabulous, possibly the best I’ve ever eaten. The recipe below is my effort to recreate it without the benefit of leftover panzanella salad.

Italian Meatloaf
2 Tbsp. olive oil
3 cloves garlic minced
1 medium onion, chopped
1 green pepper, chopped
1 cup cherry tomatoes, halved
1⁄2 cup Kalamata olives, chopped
1 Tbsp. capers
2 Tbsp. fresh parsley, chopped
2 Tbsp. fresh basil, chopped
1 cup mozzarella cheese, cubed
1-1⁄2 lb. ground meat
1 cup bread crumbs
2 eggs
2 Tbsp. Worcestershire sauce
2 Tbsp. balsamic vinegar
Salt and pepper
1 cup marinara sauce

Sauté the garlic, onion, pepper and tomatoes in olive oil with salt and pepper until tender. Then in a large bowl, mix all the remaining ingredients together – except for the marinara sauce. Shape into a loaf and place on a rack in a baking pan. I used very lean ground beef and skipped the rack. Spread marinara sauce over the top of the loaf. Bake in a 350-degree oven for 50 minutes or until the internal temperature is 160 degrees. Let the meatloaf rest 5-10 minutes before slicing and serving.

OVEN-FRIED CATFISH AND SIDES

Oven-fried Catfish

Once again, I was lucky to be the recipient of fully cleaned and filleted catfish. There must have been about two pounds. I decided to oven-fry them because my stovetop was occupied with both a pressure canner and a pot of boiling hot water-bath. When it is too hot to work outside, I bring the outside in by heating up the kitchen – at least that’s my husband’s complaint. He didn’t complain about dinner, though.

Oven-fried Catfish
2 lbs. catfish fillets
3/4 cup cornmeal
3/4 cup panko breadcrumbs
1 tsp. thyme
2 tsp. salt
1 tsp. celery seed
1 tsp. onion powder
1 tsp. garlic powder
1⁄2 tsp. pepper
1 cup milk
1 egg

Mix the dry ingredients together in a shallow pan. Whisk the egg and milk together in another shallow pan. Lightly coat a foil-lined sheet pan with cooking spray. Dip each fillet in the milk and then into the dry mixture. Lay the breaded fillets on the sheet pan with space between each – no crowding. Use another pan if necessary.

Finish with a light coat of cooking spray on the top of each fillet. Place the sheet pan in a 415-degree oven and cook for 15 minutes. Check the fish after 10 minutes and flip the fillets. I used my convection setting and did not turn the fish over; however, I only cooked them for about 12 minutes. They were nicely browned on both sides.

While the fillets cooked, I made a side of chopped tomatoes. I started by sautéing onions and a mild chili pepper in olive oil. I added minced garlic and cooked for about a minute. Then I added chopped tomatoes, salt and pepper and continued to cook for about 3 minutes on low heat.

Turn the heat off, cover with a lid and let it sit. The tomatoes should still be firm. Before serving, I added a little balsamic vinegar and chopped kalamata olives.

Red potatoes sounded good too, so I sliced them, added a drizzle of olive oil and a dash of garlic salt and cooked them covered in the microwave for 5 minutes. Then I stirred the potatoes and returned them to the microwave for another 4 minutes. (If I had thought to toast bread slices in the toaster oven, I’d have had every heating appliance in the kitchen working. No wonder David gripes that I’m heating up the house!)

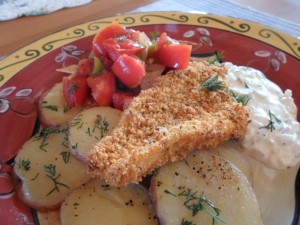
Anyway, I served the catfish with the red potatoes, chopped tomatoes and a dollop of tartar sauce. I made the tartar sauce by stirring together mayonnaise, chopped onion, minced garlic, chopped dill pickles and sauerkraut. Season with salt and pepper. Adding the sauerkraut may seem like an odd choice, but the texture and zest it gives is amazing. Garnish the plate with freshly chopped dill weed.

The next day we had fish tacos for lunch. Just reheat the leftover catfish and place on a wheat tortilla. Spread with tartar sauce and top with chopped cabbage. Yum!

Creamy Chicken and Avocado Enchiladas

Chicken avocado ench

Peppers are beginning to produce well in the garden. In addition to jalapeños, banana and green peppers, I usually plant large chili peppers called Big Daddy. Those peppers are similar to large Hatch chilies. I use them like green peppers, but occasionally I grill them, cover and once cooled, I remove the seeds and blackened skin. They are ready for use in preparing dishes that call for mild chilies or can be frozen for later.

Last Thursday I used them along with avocadoes to make a yummy green enchilada dish.

Creamy Chicken and Avocado Enchiladas
4 boneless, skinless chicken breast halves
Salt, pepper and chili powder for seasoning
2 Tbsp. olive oil
2 onions, chopped
5 mild chili peppers, roasted and chopped
6 oz. Monterrey jack cheese, shredded
12 wheat tortillas

Avocado Cream Sauce
2 Tbsp. butter
2 Tbsp. flour
2 cups chicken broth
3⁄4 cup sour cream
1 tsp. cumin
1 tsp. salt
2 garlic cloves, minced
1⁄2 tsp. pepper
3 avocados, pitted and peeled
1 bunch fresh cilantro, chopped
1 lemon, juiced

Garnishes may include fresh chopped cilantro, sour cream, cheese and jalapeño slices.

Season chicken breasts with salt, pepper and chili powder and brown each side in a large skillet. Remove breasts and sauté onions and peppers in the same skillet. Cut the chicken into bite-sized pieces and return to the pan. Reduce the heat to low, cover and simmer until chicken is done.

Meanwhile prepare the avocado cream sauce by melting butter over medium-high heat. Add flour and stir until golden. Slowly stir in broth, bring to a boil and reduce heat to a simmer for 5 minutes. Stir in sour cream, cumin, salt, garlic and pepper. Remove from heat and transfer mixture to a blender or food processor. Add avocados, cilantro and lemon juice. Pulse until smooth. Taste and adjust seasonings.

To assemble the enchiladas, spread a spoonful of avocado cream sauce down the middle of the tortilla. Then layer the chicken, onion and pepper mixture followed with cheese. Roll tortilla and place seam side down in a lightly greased baking dish. Continue building and rolling the rest of the tortillas. Drizzle about half of the remaining avocado cream sauce on top, cover the dish with foil and bake for 20 minutes in a 375-degree oven.

Serve enchiladas with a dollop of avocado cream sauce and the garnishes of your choice.

I made extra avocado cream sauce because it is great as a dip for chips or vegetables. Also, if you don’t have time to grill chilies, use a can of roasted chilies.

Corn and Black Bean Salad

corn and black bean salad

Corn, lovely sweet corn, is still the topic of this week’s column. Last week I grilled dozens of ears, and still have more left from the harvest. I froze a few, shared some with neighbors and grilled a few more. My husband comes home from work and eats one before dinner for a healthy snack. Corn is like gold in my house.

I sell my garden produce at a farmers’ market in Sulphur Springs, but I never bring corn with my vegetables. I explain to the customers who purchase eggs, tomatoes, okra, cucs, zucs, eggplant, yellow squash and freshly baked breads that my husband has declared the corn his own. One lady asked, “Do you not have enough to sell?” I replied, “As far as my husband is concerned, there will never be enough corn.” So, there you go.

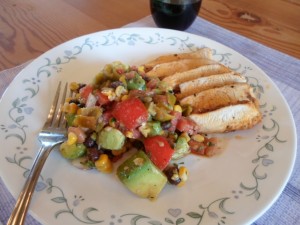
I managed to pull aside half a dozen ears for the following recipe. It is the perfect summer-time salad that keeps well in the fridge and is the hit side-dish at any barbecue or cookout. It goes well with just about everything, and is even great alone for a light dinner.

Corn and Black Bean Salad
6 ears of corn, grilled and cut from the cob
2 15-oz. cans black beans (low sodium)
4 cups tomatoes, diced
1 cup red onions, diced
4 tsp. garlic, minced
1 lemon, zested
2 lemons, juiced
1 bunch cilantro, chopped
1⁄4 cup red wine vinegar
1⁄2 cup extra virgin olive oil
1 tsp. fresh oregano, minced
Salt and pepper to taste
3 avocadoes, diced
3-4 jalapeños, minced

Mix the first 12 ingredients together and marinate in the fridge for up to 4 hours. I substituted a can of pinto beans instead of one of the black bean cans. That’s just the way I like it. I also like my avocadoes firm, so I cut them and add them right before serving. The jalapeños are a must for me, but one family member doesn’t handle them well. Trust me, life is often better when you slice them on the side and add them to your own salad if you want the heat.

Please try this delectable salad. It serves many. Go to a local farmers’ market and pick-up as much of the local produce as possible. Subsidize with canned or grocery-store produce as necessary. But seriously, this dish is fresh, easy to make and so good for you and the entire family. Sunday night, I served it with sliced roasted chicken breasts. It was delicious.

Lemony Dill Marinaded Tomatoes and Cucumbers

grilled corn and marinade

I picked most of my corn last weekend. Since I don’t spray pesticides, I usually have a small worm chewing on the tip of the corn. That earworm is actually the larva hatched from an egg the adult moth lays in the silk of the corn. When the egg hatches, the young larva feeds on the silk and ultimately the corn.

While the worm may look gross, it’s not a big deal to cut off the damaged part of the corn and process as usual. In fact, I feel better about corn from my garden or purchased at the farmers’ markets because I know it’s healthier and I expect the worm. When buying pesticide-free corn, try to look under the silk and get the ones with less earworm damage.

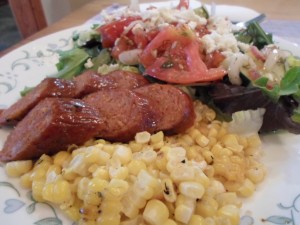
I grilled some of the corn and cut the kernels from the cob. I’ve printed that recipe before, so go to my website and search on the word “corn” for grilling tips. I also grilled turkey chorizo links to go with the corn. The buttery, smoky sweetness of the grilled corn was amazing with the spicy taste of chorizo.

Roma tomatoes and cucumbers are doing well in the garden, so I collected some of those and found a handful of dill that the grasshoppers hadn’t demolished… yet. I made a citrus-dill marinade for tomatoes, cucumbers and red onions to go with the corn and chorizo.

Citrus and Dill Marinade
½ cup olive oil
¼ cup white balsamic vinegar
1 lemon, zested and juiced
2 cloves garlic, finely minced
1 Tbsp. dill, chopped
2 tsp. salt
½ tsp. cracked black pepper

Combine all ingredients in a pint-sized jar and give it a good shake. The marinade is then ready to be poured over tomatoes, cucumbers and red onion slices. Let the vegetables with marinade sit in the fridge for about 30 minutes before serving.

I topped mixed greens with the marinated vegetables and used the juice as the salad dressing. Adding a few crumbles of feta cheese on top of the salad and skipping the chorizo makes this meal vegetarian. Refrigerate leftover marinade and use it as salad dressing later in the week.

Stuffed Chicken Saltimbocca

Chicken Saltimbocca

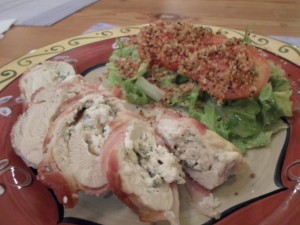
Saltimbocca in Italian means “jumps in the mouth.” I’m not sure if that’s because the flavors are so delightful when eating the dish or if it tastes so good that one can’t resist another bite. It is usually made with veal but I’ve always made it with chicken. The dish is common in southern Switzerland, Italy, Spain and Greece.

Each country has its own version and flavor preferences, so there are many variations. I’ve modified my recipe and the following version is low-cal and low-fat.

Stuffed Chicken Saltimbocca
4 boneless, skinless chicken breast halves
6 oz. reduced-fat feta cheese
1 Tbsp. fat free Half & Half
6-8 sage leaves, chopped
1 tsp. garlic salt
1⁄2 tsp. cracked black pepper
1 tsp. olive oil

Butterfly-cut the chicken breast halves by slicing widthwise almost to the other edge. Lay a large piece of plastic wrap on the cutting board. Open each breast, keeping the edge intact, and spread across the plastic wrap. Place another piece of wrap on top of the chicken. Gently pound the chicken with the flat side of a meat mallet, using a down-and-away motion until it is about 1⁄4 inch thick. The plastic wrap contains the raw chicken, reducing contamination and making clean-up easier.

Crumble the feta cheese into a bowl and mix in the Half & Half, sage, garlic salt and pepper. Place a spoonful of the mixture on each flattened chicken breast. Roll up and place on a baking pan. Brush olive oil on each roll and season with a little salt and pepper. Cook in a 400-degree oven for 25 minutes.

Clean the cutting board, utensils and work surface with hot soapy water. Always wash your hands after handling raw chicken and never reuse the cutting board without thoroughly cleaning it first. In fact, it is best to have separate cutting boards when making this dish – one for the raw chicken prep and one for processing the herbs and vegetables.

Salad with Seasoned Bread Crumb Topping
1 Tbsp. butter
1 cup panko bread crumbs
1 tsp. fresh thyme, chopped
1 tsp. garlic salt
3 tomatoes, sliced
1 head romaine lettuce

In a small frying pan, melt butter and add bread crumbs, thyme and garlic salt. Cook on low heat, stirring occasionally, until the bread crumbs are lightly toasted. Wash, drain and tear the lettuce into bite-sized pieces. Serve with tomato slices, a splash of lemon juice (or your preferred dressing) and top with the toasted seasoned bread crumbs.

The stuffed chicken saltimbocca and side salad serves 4, and each serving has about 368 calories and 15 grams of fat. For a full fat version, consider using grated provolone cheese instead of feta and wrapping each breast with thinly sliced bacon or prosciutto before baking.

Beef and Vegetable Stir Fry

Beef Veg stir fry

Keeping up with weeds in the gardens and flower beds is a never-ending job. When I think I’m getting caught up in one area, I look around and realize I’ve fallen behind somewhere else. My hands and nails are stained from pulling weeds and my arms and legs are itchy with bug bites and scratches. Yet when I look back at where I’ve been and the garden looks so neat, I’m happy and feel a sense of accomplishment.

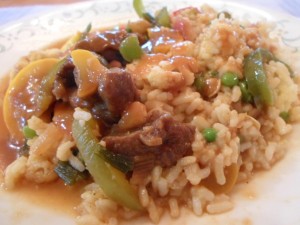
I pulled up the remaining onions and English peas. I also cleared out the lettuce beds that were full of weeds, grasshoppers and the now-bitter greens to make room for eggplant and peppers. I made a stir fry with the peas and a few of the onions – and of course – squash makes its return in this dish too.

Beef and Vegetable Stir Fry
1 lb. beef arm roast, cubed
4 cups squash, chopped
1 cup onion, chopped
4 cups cauliflower, chopped
1 cup red and green bell peppers, chopped
2 cups English peas, divided
1 cup beef broth or stock
8 cups cooked rice
2 eggs

Marinade:
1⁄2 cup soy sauce
1⁄4 cup teriyaki sauce
2 Tbsp. brown sugar
2 Tbsp. rice wine vinegar
2 Tbsp. sesame oil
6 tsp. garlic, minced
1/3 cup onion, minced

Prepare the marinade and combine with the cubed beef in a sealable bag. Place in a bowl and marinate in the refrigerator for at least 8 hours. Flip the bag over a few times to make sure the marinade is coating the meat.

When ready to cook dinner, drain the meat and reserve the marinade. In a small pot, bring the reserved marinade and 1 cup beef broth to a boil and continue to cook until it is reduced by half. Prepare rice and add half the fresh English peas and the eggs to the rice after removing from heat. Stir well and place the lid on top. The eggs will cook and the peas will heat by dinner time.

In a wok or large pan, cook the beef on high heat until done. Remove with a slotted spoon and cook the vegetables in the pan juices. Do not over-cook. They should still have some crunch. Return the beef, pour the marinade sauce over all and stir.

Serve the beef and vegetable mixture over rice. The recipe makes 8-10 servings. Each serving contains about 750 calories and 12 grams of fat. After dinner, the leftovers can be packaged in containers to be taken for lunches during the week.