Macerated Cherry Tomatoes

Macerated Tomatoes

I spent every second possible last week outside. I love that weather and while taking stock of work still needing to be completed, I wandered into my weedy tired garden. What a blessing to find ripe red cherry tomatoes. After tasting one, I found it sweet and flavorful. There’s nothing like home-grown tomatoes.

I picked all I could hold in the hem of my T-shirt and made a mental note to get back out there before the frost this week. I’m sure I will have a bushel of green tomatoes and peppers to pick.

After an exquisite day outside, I wanted something light and quick for dinner, and why not use some of that produce I picked?

Macerated Cherry Tomatoes
4 c. cherry tomatoes, halved
1 small onion, small diced
1/2 green pepper, small diced
1 glove garlic, mined
2 Tbsp. capers,
1/3 cup olive oil
1/3 cup balsamic vinegar
Salt and pepper to taste

Mix all ingredients together and let sit on the countertop for at least 1 hour. If you have the time, five hours is even better. Marinating in this way brings out the natural sweet juices of the vegetables.

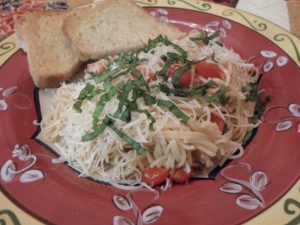
I cooked 12 ozs. of angel hair pasta in salted water, drained and returned to the pot. Stirring in a little olive oil will keep the noodles from sticking while the hot pot reduces excess water.

Since I marinated my vegetables in a large serving bowl, I just dumped the pasta on top and tossed the everything together along with 1 cup of Parmesan cheese.

Fresh basil was still available in the garden, so I chopped some for garnish. I served that dish at just above room temperature along with buttered toasted sourdough bread.

The macerated cherry tomatoes are also good on toasted bread or bruschetta. Store any leftovers in the refrigerator and the next day they also spruce up a simple green salad, no other dressing necessary.

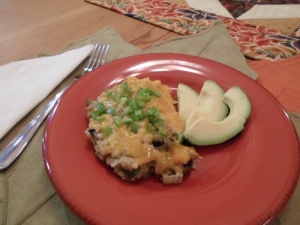
Fiesta Casserole

Fiesta Casserole

Casseroles are great for family dinners or potlucks. They usually provide leftovers for weekday lunches too. I like them because they are so versatile. Usually the meat, vegetable and grain can be substituted with another ingredient in that same family, creating a new dish. Here’s the recipe I used, but modified to make it my own.

Fiesta Casserole
1 lb. lean ground meat
1 large onion, diced
1 green pepper, diced
1 clove garlic, minced
1 Tbsp. olive oil
2 tsp. dried oregano
2 tsp. ground cumin
4 c. cooked rice
1 can black beans, rinsed and drained
1 Tbsp. butter
1 Tbsp. flour
1-1/2 c. milk
12 oz. cheddar cheese, grated, divided
1/2 c. sour cream
Salt and pepper, to taste

Season the ground meat with salt and pepper and brown in a skillet. When done, transfer meat to a large heat-safe mixing bowl. Saute onion, pepper, garlic, oregano and cumin with a pinch of salt and pepper in olive oil until translucent. Then transfer to mixing bowl. Add cooked rice and beans, tossing all together.

Then make a sauce by melting butter in a skillet and sprinkle in flour. Stir and cook for about 2 minutes. Add milk and continue stirring until sauce thickens. Add half the cheese and continue to stir until melted.

Remove from heat and stir in sour cream. Pour sauce into the mixing bowl and stir until combined. Yes, there’s lots of stirring in this recipe.

Prepare a 9×13” baking dish with cooking spray. Pour contents of bowl, spreading evenly, into the dish. Cover with foil and bake in a 350-degree oven for 30 minutes. When done, sprinkle the remaining cheese over the top. Garnish with chopped green onions, cilantro or minced peppers.

I am making an effort to use more brown rice, quinoa or other whole grains, so I used 3 cups of brown rice and 1 cup of quinoa. Substituting cooked and cubed chicken for the ground meat is another option. I also used mild chili peppers and 1 small jalapeno instead of the green pepper.

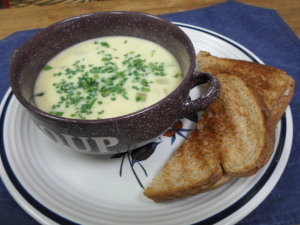
Vegetable Chowder

chowder

Chowder (or up North it’s chowda) is a fish or vegetable stew. Traditionally it is made with a creamy, buttery base and thickened with crushed crackers; however I prefer to mash up some of the vegetables. And of course, I add cheese saving the saltines for crumbling on top.

Vegetable Chowder
2 Tbsp. butter
1 Tbsp. olive oil
1 onion, diced
2 chilies, diced
2 garlic cloves, minced
1 tsp. thyme leaves
1-2 bay leaves
1/2 c. flour, divided
6 c. vegetable stock
2 ribs celery, diced
2-3 large potatoes, diced
10-oz. bag frozen corn or 6 ears fresh
2 c. fat-free Half&Half
1 c. cheddar cheese, shredded
Salt and pepper to taste
Fresh herbs, chopped for garnish

Heat butter and olive oil in a large pot. Add onions, chilies and a pinch of salt and pepper. Cook on medium heat until onions are translucent.

Add garlic, thyme and bay leaves. Continue to cook until herbs and garlic are fragrant – about 5 minutes. Stir in 1/4 c. flour and cook for about 3 minutes.

Add vegetable stock, celery and potatoes. Bring up the heat until the liquid simmers, turn the heat to low and cook for 15 minutes.

Using a potato masher, mash about half the potatoes to help thicken the stew. Add corn and cook until the corn is hot.

Add the Half&Half. Toss the cheese with the remaining flour – this keeps the cheese from clumping – and add to the pot. Stir until the cheese melts. Taste and season with salt and pepper if needed.

Garnish with the leftover chopped celery leaves or chopped fresh herbs like parsley or chives.

The chowder serves 8 and is great for vegetarians. Adding a couple cups of diced cooked ham or chicken is an option for those who are not.

While it’s a meal all by itself, adding sandwiches or a side salad will spread this meal to feed 10-12.

Tips: if the chowder is too thick, add milk. To thicken further, add cornstarch to the cheese instead of flour.

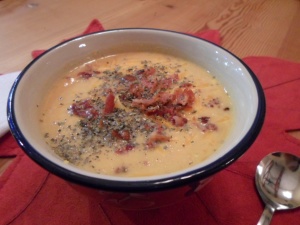
Butternut Squash Soup

Butternut squash soup

I love the crisp cool fall mornings. The dog, cats, chickens and baby calves seem to be more frisky and playful as the season changed. One afternoon last week after a cool rain, I really had a hankering for soup.

I already had butternut squash purchased a week or two before – I was ready for fall well before it began.

I added sweet potatoes to the soup to help thicken and to bring out more color. I was very pleased with the results and will certainly include those when making it again. Carrots would also be a nice addition.

Butternut Squash Soup
2 butternut squash
1 Tbsp. olive oil
1 Tbsp. butter
1 onion, diced
2 sweet potatoes, cubed
2 cloves garlic, minced
4 c. chicken broth
2 bay leaves
1 tsp. thyme
1 c. fat-free Half&Half
Salt and pepper to taste

Cut the butternut squash into halves – not an easy task. Using clean hands, rub a little olive oil over the squash and season lightly with salt and pepper. Place the cut side down on a pan and bake at 425º for about 50 minutes. Remove from oven and let cool.

Using a large pan or Dutch oven, heat olive oil and butter. Slowly cook onion with a pinch of salt and pepper at medium-low heat until they caramelize – taking at least 30 minutes. Then add garlic, sweet potatoes, broth, bay leaves and thyme. Turn up the heat and stir to combine all ingredients. Bring to a boil, then reduce heat to a low simmer and cook for 15-20 minutes.

With a large spoon, scoop out the meat of the butternut squash and add to the soup. Turn off the heat, remove the bay leaves and purée the soup using an immersion blender or in batches with a food processor. Bring the pot of soup back up to low heat and cook until the soup thickens – about 15 minutes more.

Remove from heat and stir in Half&Half just before serving. Garnish with grated cheese, roasted pumpkins seeds, crumbled bacon or croutons.

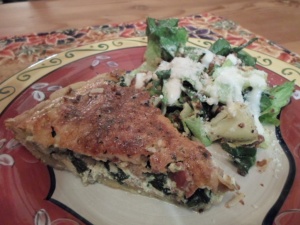
Mushroom and Spinach Quiche

Quiche

I have 27 laying hens. Mostly they are Americaunas or “Easter-egg” chickens, and I have a few Barred Rocks and Buff Orpingtons too. The girls and rooster Henry are pasture-raised. That means they are free to roam wherever they want looking for bugs and other tasty treats. It makes for healthier richer eggs, but it also makes every day an Easter egg hunt. Some of them feel that a tall patch of grass near a bush is a safer place to lay than in the nesting boxes.

I usually sell their eggs and the girls support themselves. We eat the eggs that I won’t sell because they have a peck-mark crack or some are so large they don’t fit into a carton. Those always have two yolks. I had a few saved up and decided to make a quiche.

I wanted to try a new pie crust recipe using wheat flour and olive oil instead of the usual all-purpose flour and shortening. It turned out well and is great for a savory dish like the quiche, but it would not be right for a dessert pie.

Mushroom and Spinach Quiche
For the crust:
1 c. wheat flour plus a little extra
1⁄4 tsp. kosher salt
1⁄4 tsp. black pepper
1⁄4 tsp. baking powder
1⁄4 c. extra-virgin olive oil
3 Tbsp. ice water

Combine dry ingredients in a food processor and pulse a couple of times to mix. Measure the olive oil and add the ice water to it. I usually fill another cup with ice and pour water over it. I let it sit a couple of minutes until it is really cold and then I carefully skim the cold water off the top.

With the processor on, slowly pour in the oil and water mixture. Process until the dough starts forming a ball. Turn the dough out onto a lightly floured surface and knead for about a minute. Press the dough into a disk and wrap in plastic wrap. Let it chill for 20 minutes.

Then roll out the dough. Fit it into a pie pan lightly coated with cooking spray. My dough was a little crumbly and separated at the edges, but I pressed it together in the pan. With a fork, I pierced the crust multiple times on the bottom and sides. Bake in a 425º oven for 10-12 minutes or until the edges are golden. Let it cool while you make the filling.

For the filling:
3 slices bacon
1⁄4 c. onions, chopped
8 oz. mushrooms, sliced
2 tsp. fresh thyme
2 c. packed fresh spinach
1 c. low-fat milk
1/3 c. fat-free Half-and-Half
4 large eggs
3 oz. Swiss cheese, grated
Salt and pepper

Cook bacon until crisp. I cooked the entire package using 3 slices for the quiche, 3 slices for a salad and the remaining saved for another meal. Reserve 1⁄4 cup of the bacon fat for later to be used in a salad dressing and crumble the bacon for the quiche and the salad.

Cook the onions, mushrooms and thyme in the pan with the residual bacon grease – about 10 minutes. Stir in the spinach and cook until it wilts. Then remove from heat.

Process the milk, Half-and-Half, eggs and a pinch each of salt and pepper in the food processor until smooth. Arrange half the Swiss cheese over the crust, layer the spinach-mushroom mixture and bacon over that and top with remaining cheese. Pour the milk mixture over all.

Bake at 350º for 45 minutes until the filling is set. I usually place strips of foil along the perimeter of the pie after about 15-20 minutes. That will keep the exposed crust from getting too brown. Let stand 10 minutes before cutting and serving.

Warm Bacon Dressing
1⁄4 c. warm bacon fat
1⁄4 c. red wine vinegar
1 tsp. sugar
1 tsp. Dijon mustard
Kosher salt and black pepper

Whisk all ingredients together tasting and adding a pinch of pepper and salt if needed. Crumble three slices of bacon and tear a head of Romaine lettuce into bite-sized pieces. Toss with the dressing and serve.

Sweet Potato Casserole

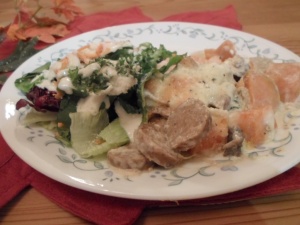
Pierogi-Sweet potato casserole

Before I semi-retired and moved to the country, I traveled extensively with my job. Being away from home and family wasn’t fun, but I did enjoy new sites and trying local cuisines. When I visited Chicago, I always liked to dine at a Polish family restaurant that served pierogi. Those are savory-filled little egg-dumpling pouches. My favorites were filled with potatoes and cheese, but they also had meat and sauerkraut fillings. The dumplings are first boiled, then either baked or fried with sautéed onions and garlic and served with a sour cream sauce.

It’s been a long time since I’ve had a pierogi and was delighted when I ran across a casserole recipe that called for them. Apparently, they can be found in the frozen food aisle of most grocery stores – unfortunately not ours. I was very disappointed, but the recipe sounded too good to skip. I didn’t have time to try making the dumplings myself, perhaps another day, so I decided to substitute with sweet potatoes.

Pierogi/Sweet Potato Casserole
16-oz. pkg. frozen potato pierogi (or 2-1/2 lbs. sweet potatoes peeled and cubed)
1 small onion, chopped
1 Tbsp. olive oil
12 oz. chicken sausage, cooked and sliced
8 oz. mushrooms, sliced
1 clove garlic, minced
1 tsp. thyme
2 c. packed spinach, chopped
6 oz. cream cheese, softened
1⁄2 c. sour cream
1 c. chicken broth
1⁄2 tsp. salt
1⁄4 tsp. black pepper
1 c. mozzarella cheese, grated

Cook sausage links until brown on all sides and then remove. In the same pan, sauté onions, mushrooms, garlic and thyme in olive oil. Season with salt and pepper. Then add spinach, cream cheese and chicken broth. Slice sausage and add back to pan. Cook until the spinach has wilted and the cream cheese melts. Remove from heat and stir in the sour cream.

Place pierogi (or sweet potatoes) in a casserole dish and spread the sauce to cover. Then top with mozzarella cheese. Bake uncovered in a 400-degree oven for 30 minutes. The casserole is done when the pierogi/sweet potatoes are fork-tender.

The pierogi-inspired dinner came out well. I’m happy to discover another sweet potato recipe since I still have some from the garden, but I will continue to hunt for a local pierogi source. It may just have to be me.

Creating authentic-tasting traditional foods is an art. It will take the patience of multiple trials using advice from experts (like a Polish grandmother). I’ll probably have to find that online, but I love a challenge.

Slow Cooked Pork Roast

Slow-cooked pork

There’s nothing like the smell of something cooking low and slow when you come in after working hard outside. I cooked a pork shoulder roast in the crock pot. The roast was one of those with the store’s fluorescent tag reading, “Cook or freeze by…” and the current day’s date. Although I found that a little disconcerting, I just can’t pass up a good deal. I also figured that cooking it all day would take care of anything questionable the sticker might suggest.

The roast was almost 4 lbs. and could provide a few meals, so I seasoned it knowing the leftovers would be used in spicy burritos or pulled-pork sandwiches. I started with a layer of chopped onions and about 6 garlic cloves in the bottom of the pot. Then I coated the roast with a seasoning rub. I use the same rub for any beef or pork roast.

Roast Seasoning Rub
1 Tbsp. sea salt
1 tsp. cracked black pepper
1/2 Tbsp. each of thyme, oregano, chili powder and celery seeds

Mix the seasonings together, rub over the entire roast and set it on top of the vegetables. I usually add a small amount of liquid, so I diluted about a Tbsp. of barbecue sauce in 1/3 cup water and drizzled on top of the roast. Worcestershire sauce or broth would also work. Then cover and set on low for 8 hours.

The cook time tends to vary with different crock pots. I own two and find their cook time variance is up to 2 hours. However, I know the roast is done when it falls easily from the bone or is easily separated with a fork. Then, let the roast rest for 15-20 minutes.

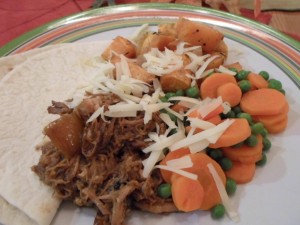
I served it with oven-roasted sweet potatoes, peas and carrots garnished with shredded swiss cheese for that night’s dinner. Afterward, my husband made a pulled-pork sandwich to take for lunch the next day. We’ll also have sandwiches for one dinner this week and use the rest of the roast for either burritos or as baked potato toppings another night. That’s pretty amazing for a $7 roast.

Creamed Spinach

Every year when I purchase seeds for starting plants in the spring, I include something that I haven’t tried before. It keeps life interesting. This year it was basella alba – also known as malabar spinach. Starting those seeds requires scoring with a knife, soaking overnight and then planting in pots. I kept them in the greenhouse until frost dangers passed and then transplanted them in the herb garden.

Once in the ground, they grew slowly. I soon realized that unlike standard spinach greens, that plant needs heat for its growth spurt. Once the daily temperatures stayed above 90 degrees, the plants took off, creating large waxy leaves on a thick yet tender vine. Grasshoppers don’t seem to care for chomping on the leaves, so the plants are huge and have outgrown the trellis. It was time to figure out what to do with the strange tropical-like green vegetable.

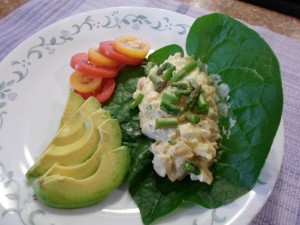
I had read that the leaves could be used similar to spinach in a salad, so I picked a few. The larger leaves released a little slime when they were broken from the vine. It smelled like freshly mown green grass and it tasted – how I imagined – green grass would taste. For dinner that night, I used a large leaf to make a wrap for chicken salad. The boys chose to just make a sandwich with bread instead. My wrap was okay, but the thick leaf released a small amount of slime with each bite – not a happy story. I’ve decided that when eating raw malabar spinach, one should stick to the smallest leaves (less slimy) and mix with other greens in a salad.

Spinach-chicken wrap

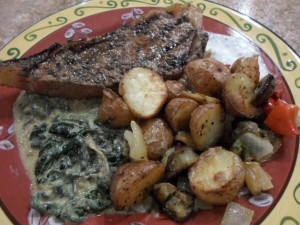
I didn’t give up, though. I found that the cooked greens have potential. Another evening I fried bacon and sauteed onions and garlic. Then I dumped about a dozen large leaves – washed and quartered – into the pan. I tossed them around, lowered the heat and covered with a lid. It took longer to wilt than spinach. But once wilted, it looked and tasted just like spinach. I decided to make creamed (malabar) spinach to go with grilled steaks and roasted potatoes. Now that’s a happy ending!

Creamed Spinach
2 slices bacon, cut into small pieces
1 onion, chopped
2 cloves garlic, minced
10 oz. frozen spinach, thawed and drained (or a very large bunch of fresh spinach)
1/3 c. fat free Half & Half
1/3 c. Parmesan cheese, grated
salt and pepper to taste
1 pinch nutmeg, freshly grated is best

Fry the bacon until crisp. Add onion, garlic and a little salt and pepper. Cook until the onion softens and the garlic is aromatic. Add spinach. Toss to coat with bacon grease. Reduce heat. If using thawed spinach, cook until warm. If spinach is fresh, cover with a lid and steam until wilted.
Remove lid and add Half & Half, Parmesan cheese and nutmeg. Stir and continue cooking until thickened. Taste and add salt and pepper as needed.

My cream sauce was still too wet – perhaps because malabar spinach has more juice than regular spinach – so I added 2 teaspoons of flour and stirred. The cream sauce thickened to a nice consistency after about 5 more minutes of cooking.

Creamed spinach

I like having another fresh green option at this time of year. Malabar spinach, with a little more trial and some error, will probably turn out to be a good (maybe not great) alternative to store-bought spinach. It’s difficult to imagine picking, blanching and freezing it for use this winter, though. We’ll see.

I have a purple-hull pea update for those who remember me having more peas to shell than I could process. One of the Leader readers advertised a pea sheller in the classifieds. I contacted him, purchased and brought it home. I couldn’t be more pleased and shelled over 3 bushels of dried peas in less than an hour. Success!

Asian Tuna Steaks with Stir-fried Vegetables over Rice

Asian Tuna Steak stir-fry

I volunteer every Wednesday as a cook in a church-sponsored program that feeds the hungry. Our food comes from the North Texas Food Bank, donations from community gardens, gifts or reduced prices from local food suppliers and items purchased by the church. We often receive large amounts of produce that would spoil before we could serve it, so it is processed and frozen for later use.

The freezers in that kitchen were very full and unmanageable. So last week after serving lunch, we pulled everything out of the freezers and sorted it by cooked and uncooked meats, vegetables, dairy, etc. Then we planned several weekly meals around those items and grouped them together as we returned everything to the freezers.

We’ll need to buy a few things to complete those meals, but we will be providing a healthy, delicious lunch using items we already have, and there’s the added bonus of freeing up freezer space. That exercise got me thinking about my own freezer space and the items in the refrigerator that would be thrown out if not used soon.

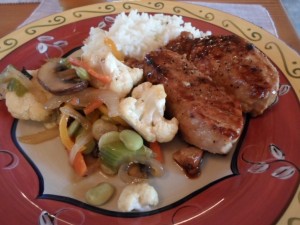
What some people refer to as a garbage can dinner started with 4 frozen tuna steaks. I’m sure I bought them as a bulk purchase and those were the few still left. I also found half a bag of frozen lima beans. How else would I use them? In the refrigerator I had a head of cauliflower. It had a dark spot that I removed and I remembered buying it on a whim, with no real plan at the time. That’s what happens. Add in the rest of the mushrooms from the package used in last week’s scallopini, and I had the makings of terrific Asian tuna steaks with stir-fried vegetables served over rice.

Asian Tuna Steaks
4 frozen tuna steaks, thawed
1⁄4 cup sweet chili sauce (like Mae Ploy)
1⁄4 cup rice wine vinegar
1⁄4 cup soy sauce
2 tsp. grated ginger root
2 Tbsp. brown sugar
1⁄4 cup canola oil

Combine all ingredients in a sealable plastic bag and marinate for 20 minutes. Meanwhile, prepare a pot of rice and get the vegetables cleaned and chopped for the stir-fry.

Stir-fried Vegetables
1 onion, julienned
2 peppers, julienned
2 carrots, julienned
2 celery ribs, cut on a bias
8 oz. mushrooms, cleaned and sliced
1 head cauliflower, cleaned and chopped
1⁄2 bag frozen lima beans
2 Tbsp canola oil, divided
1⁄4 cup stir-fry sauce
Salt and pepper

Pop the lima beans in the microwave for 4 minutes. In a large frying pan, heat 1 Tbsp. canola oil on high heat. Cook the cauliflower allowing it to brown lightly, but don’t over-cook it – there should still be some crunch. Remove the cauliflower and add the sliced mushrooms, searing each side until golden brown and then remove.

Add 1 Tbsp. canola oil to the pan and cook the onions, pepper, carrots and celery with a little salt and pepper, stirring often. When the vegetables begin to brown, reduce heat to medium and return all the vegetables to the pan with stir-fry sauce. Gently mix all together and pour into a serving bowl. The great thing about stir-fried vegetables is that the combinations are endless.

Place that same frying pan back on the stove and set heat to medium high. Sear tuna steaks on each side for about 3-4 minutes. Add marinade to the pan, reduce heat to low, cover the pan and cook for 8-10 minutes.
Serve the tuna steaks over rice with the stir-fried vegetables on the side. Drizzle pan sauce over all. Other garnishes may include chopped fresh cilantro or green onions, soy sauce, and Sriracha hot chili sauce.

Hint – Peel and grate leftover fresh ginger root and store with a little oil in the freezer.

Chicken Scallopini with Spaghetti Squash

chick scallopini

I bought a spaghetti squash at the market. A friend grew a few, but planted too close to zucchini and cross pollination caused them to look strange. In hindsight, I should have asked her for one. It still may have baked just fine. I remember when she composted them that they cut more easily than the one I bought.

With difficulty, I finally cut through the gourd and scooped out the seeds. I used a tsp. of olive oil and by spreading it around with my hands, coated each half. Sprinkle the inside flesh with a little salt and pepper and lay cut-side down on a foil-lined baking dish. Bake in a 450-degree oven for about 30 minutes.

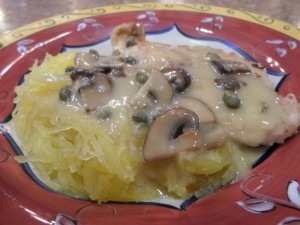
Let the squash cool enough to handle. I used a paper towel holding the squash in one hand while pulling out the flesh with a fork into a bowl. The fork helped break it up into little ribbons that looked remarkably like spaghetti noodles. Like pasta, the squash had very little taste, so topping it with marinara or butter and Parmesan is a great idea. However, I made chicken scallopini and it paired nicely.

Chicken Scallopini
8 oz. baby bella mushrooms, cleaned and sliced
4 boneless, skinless chicken breast halves
1 cup flour for dredging and gravy
1⁄2 stick butter, divided
4 Tbsp. olive oil, divided
1 cup chicken broth
1⁄2 cup dry white wine
1⁄2 lemon, juiced
1 Tbsp. capers
Salt and pepper, to taste

Brown the mushrooms in 1 Tbsp. each butter and olive oil over medium heat. While those cook prepare the chicken. Cut the chicken breast halves by slicing through widthwise. Lay a large piece of plastic wrap on the cutting board. One at a time, lay the chicken portion on the plastic wrap. Place another piece of wrap on top. Gently pound the chicken a few times with the flat side of a meat mallet, using a down-and-away motion until it is about 1⁄4 inch thick. The plastic wrap contains the raw chicken, reducing contamination and making clean-up easier.

Remove the mushrooms from the pan, add another Tbsp. each butter and olive oil. Lightly dredge each chicken piece in flour seasoned with salt and pepper. The coating for this recipe is not heavy. When the butter and oil have heated, place four chicken pieces in the pan and cook at medium to medium-high heat for 3 minutes on each side. Remove the chicken and add another Tbsp. each of butter and olive oil. Cook the last four pieces.

Add the remaining butter and olive oil to the pan with 1 Tbsp. dredging flour and stir to incorporate. Let the flour cook a couple of minutes on medium heat. (Throw away remaining dredging flour.) Add chicken broth, wine and lemon juice to pan. Stir until smooth. Add capers and the cooked mushrooms. Let the wine cook a couple of minutes, taste and add salt and pepper if necessary. If the gravy is too thick, add a little more chicken broth.

Serve the chicken over a cup of spaghetti squash topped with the gravy. The recipe serves 8.