Creamy Beer Cheese Soup

Beer-cheese soup

Mise en place (meez on plaus) is a French phrase meaning to “put in place.” Some recipes require almost constant attention and/or the process moves so quickly that the chef doesn’t have time to prep ingredients while cooking the dish. Mise en place encourages having ingredients prepped, measured, lined up and ready to go. Equipment – like a pot, spatula and immersion blender – is set out and at hand.
I made an incredibly rich and creamy beer-cheese soup that required constant stirring and heat management. With everything in place beforehand, the recipe went smoothly.

So, let’s start with mise en place:
• Fry 8-10 slices of bacon (or the entire package) – I often bake bacon in a 350-degree oven on a wire rack over a sheet pan – less mess. Reserve about 3 tablespoons of the grease.
• Measure 4 tablespoons of butter.
• Dice a couple of onions, 4-5 carrots and 4-5 celery ribs.
• Mince 6 cloves of garlic.
• Set out a cup of flour.
• Measure 2 cups of beer. I used amber ale. I’m not much of a beer drinker, but I tasted the ale first and it was pretty good. Don’t use a beer you don’t like. All the alcohol will be cooked out and it will have a fantastic flavor.
• Set out a quart of milk and a quart of chicken broth. Both need to be warmed since adding cold liquid will slow down the process.
• Get the bottle of Worcestershire sauce out of the fridge. About 2 tablespoons is needed, but just eyeball that amount.
• Shred 2.5 lbs. – yes, that’s right – of cheddar cheese. I used a combination of extra-sharp and mild cheddar, because that’s what I had.
• Of course, have salt and pepper ready for seasoning the soup.
• You’ll need a large heavy-bottomed pot and lid, a large spoon for stirring and an immersion blender. If you don’t have an immersion blender, put it on your Christmas list. I use mine all the time.

Now that everything is in its place, begin by heating the reserved bacon grease and butter in the pot over medium heat. Add the onions, carrots and celery – season lightly with salt and pepper. Cook covered for about 20 minutes, stirring occasionally. Then add the garlic and cook for about a minute.

The almost constant stirring begins as you add the flour and cook for a few minutes until it is incorporated with the vegetables. Add the beer and keep stirring. Once that’s blended in, add the milk, chicken broth and Worcestershire sauce and turn the heat up to medium-high. Keep stirring and bring the liquid to a simmer. Then turn the heat down to medium-low and simmer for about 10 minutes – and don’t forget to stir.

Purée with an immersion blender directly in the pot. A blender or food processor can be used, but you’ll need to let the liquid cool first and then bring it back up to heat before the next step.

With the pot over medium-low heat, add the cheese slowly and stir constantly. Never let the liquid come to a boil while adding the cheese. Taste the soup and season with salt and pepper. Serve with crusty bread or croutons, bacon, carrot or celery sticks, apple slices or anything that can be dipped. The soup is so smooth and creamy, it’s like a fondue.

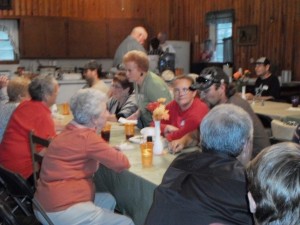
Fun with friends at the Bonanza Meet Your Neighbor Stew

Stew 2

Last Saturday evening, my husband and I attended the Bonanza community’s Meet Your Neighbor Stew. It was the first time that we had ever been in the Bonanza Community Center and it is indeed a treasure. The organizers arranged for several stews, homemade cornbread and wheat bread, pickles and other fixings. And the array of desserts was most impressive.

Our community is made up of individuals who have lived in the Bonanza area all their lives – even attending the school before Rains opened, individuals who had left, yet returned because of their love for the area and the relative newcomers like my husband and me who were seeking the peace of country living. I did not bring stew to the event – maybe next time – but I did make beef stew last week.

I usually look for a nice roast and cut it into 3⁄4- to 1-inch cubes. Dredge the cubed meat in flour seasoned with salt, pepper, garlic powder, onion powder, celery seeds and oregano. Clean and cut onions, carrots and celery into the same sized cubes as the meat. Also, mince 4 garlic cloves. I use two pots while making this stew, one that is wide to brown meat and sauté the vegetables and one that is tall enough to hold all the ingredients as I build the stew.

Heat vegetable oil in the wide pot and add the meat. Sizzle the meat until it is nicely browned on all sides. The flour will stick to the bottom of the pan, but don’t worry, just add about half a cup of good red wine to deglaze it – beef stock will also do the job. When most of the stuck-on bits have released, pour the contents into the tall pot.

Return the wide pot to the burner, add a little more oil and sauté all the vegetables over medium heat. As the vegetables cook, they’ll release liquid and finish deglazing the bottom of the pan. Those brown bits are important since they add a rich flavor to the stew. Pour the finished vegetables into the tall pot.

Cube potatoes and add them to the tall pot. Pour in enough beef stock to cover all the ingredients, along with a jar or can of tomato bits, and turn on the heat. Add seasonings. I always add bay leaves and usually add a small amount of crushed fennel seed, dill seed, thyme and black pepper. When the pot comes to a boil, add salt. Reduce the heat to a simmer, cover the pot and cook 15 minutes to finish the potatoes.

Meanwhile, I cut up okra and dredged it with flour, cornmeal, salt and pepper and pan-fried it in the wide pot. That process keeps the okra crisp and it doesn’t turn to mush after it is added to the stew. When the potatoes in the tall pot are fork tender, add the fried okra and a small bag of frozen peas. Simmering the stew for 10 minutes more warms the peas, and the okra breading additionally thickens the stew.

A few tablespoons of Worcestershire sauce (or red wine vinegar) helps brighten the stew. Taste and add salt and pepper as necessary. The rich stew is now ready to serve and enjoy with family and friends.
Holding a community supper is a great way to build a strong community. The Bonanza gathering was a treat and it was enjoyable to meet and converse with young and old alike. The food was wonderful, but certainly our greatest treasure is the community of neighbors and friends.

Stew 1

Spiced Carrot Soup

Spiced carrot soup

This weekend I cleaned up my garden, uprooting tired purple-hull pea bushes, cutting back leggy okra and pulling out some old root vegetables. I was able to scrounge up a handful of gnarly carrots. They looked horrendous, but had a surprisingly good taste. I decided that a spiced carrot soup with crusty bread would be a perfect dinner for a cool fall evening.

Carrots provided the inspiration, but they were lacking in quantity. So I peeled and chopped those carrots into 1-inch pieces and did the same with 2 lbs. from the store. I also chopped a large onion, 3 garlic cloves and finely shredded about a tablespoon of ginger root. I added all to a medium-hot pan with olive oil, salt and pepper. Ginger provided some spice, but I didn’t stop there. I added two bay leaves, a dash of ground coriander and 2 teaspoons each of red curry powder and ground turmeric. That kicked up the spice level.

I stirred in 6 cups of chicken stock (vegetable stock would work as well) and let the pot simmer covered for 20 minutes, stirring occasionally. Then after testing the carrots to make sure they’re done, turn off the heat. Let the soup sit and cool about 20 minutes before processing. It’s also a good time to remove the bay leaves – they don’t blend well and can be bitter if left in the soup.

I used an immersion blender and the soup didn’t need to cool much. If a food processor is to be used, let the soup cool more. Scary hot liquid flying around in a food processor or blender is not a good thing. The soup can always be reheated if it has cooled too much.

Once the soup is silky smooth, add about 2 tablespoons of Worcestershire sauce. Taste the soup and season with salt and pepper as necessary. The soup is yummy served with a dollop of Greek yogurt or sour cream, crumbled bacon bits and fresh chopped cilantro or parsley. I added a hunk of crusty bread to the meal. The ginger gave the soup a hint of heat and the other spices rounded out with warm autumnal tones. That’s comfort food to me.

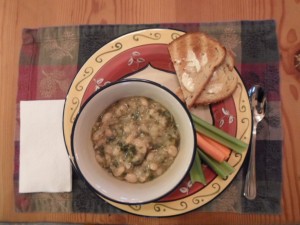
White bean and kale soup

White bean soup

I kept expecting rain on Sunday, but never received any. However, my anticipation spurred me to play in the kitchen rather than outside. I wanted to try a recipe for hot pepper butter. While working through the details of that, I made a terrific white bean soup. That’s what’s for dinner.

Since dinner was decided on the spur of the moment, the “quick-cook method” was used rather than soaking the Great Northern beans overnight. Cooking the full 2 lb-bag makes sense for us because leftovers rarely go to waste at our house. The other really great thing about the dinner is how incredibly inexpensive it is?

Sorting through a bag of beans, cull out the strangely shaped and mottled-colored ones. I didn’t find any clods of dirt, but have in the past and believe that sorting through beans is worth the effort. Rinse the beans off in a colander then pour them into a large pot; cover with 3 quarts of water; put on a lid and bring to a boil. After two minutes or so, turn the burner off and let the beans sit for an hour. During that time I thawed frozen chicken stock.

After an hour, drain the beans in the colander and rinse very well with cool water. Returning the beans to the pot, cover in chicken stock and water to equal 3 quarts and bring back to a boil. At boiling, add seasonings. I added salt, pepper, 3 bay leaves and 1.5 teaspoons each of cumin seeds and celery seeds. Cover the pot and turn down to a simmer for another hour, stirring occasionally.

I decided to add onions, celery and garlic to the soup. In a skillet, spray a small amount of olive oil and sauté a large chopped onion and three ribs of chopped celery. Don’t forget to lightly salt and pepper. Mince a couple garlic cloves, cook the vegetables for another couple of minutes and add all to the pot of beans.

Wanting more color, I picked a large bunch of kale from my garden. After cleaning and cutting away the tough stems, chop the kale into small pieces and add to the pot. Taste the beans and liquid. Add salt if necessary and check the beans to determine if they are done. Mine were still a little tough and that’s good because I wanted the kale to cook.

After another 20 minutes, I checked the beans again and they were perfectly tender yet firm. Dinner was meatless but full of vitamins and protein from the beans, vegetables and chicken stock. A vegetarian could use vegetable stock instead and still have a hearty, healthy meal.

While dinner was a success, I think my hot pepper butter recipe is going to need more work. I’ll keep playing with that and when I’m happy with the results, I’ll share.

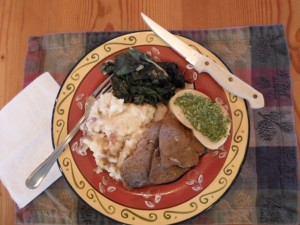
Braised beef chuck roast with mashed potatoes, wilted chard and bread

Braised roast beef

Choosing the right cut of meat is very important when making a roast. I usually make pot roasts for several reasons. The cut of meat is cheaper, more readily found at the grocery store and I like the simplicity of one-pot meals. However I’ve been craving good roast beef. Prime rib is heavenly but expensive and I didn’t even see one at the store. I was looking for a round that could be cooked using dry heat and only saw very thin cuts. Not what I wanted in a roast. I ended up buying a 3-lb. chuck tender roast.

Chuck tender sounds like an oxymoron to me – you know like jumbo shrimp. I was hoping that maybe on the chuck-toughness scale, this one would be at the more-tender end. I decided to braise the roast which uses both dry heat and moist heat to cook.

I took the roast out of the fridge and let it sit while I quartered two onions and slivered garlic cloves. Using a thin knife, I cut slots in the roast and pushed in the garlic slivers. I liberally seasoned the roast with salt and pepper.

Finding a large oven-safe pot, I heated a couple of tablespoons of olive oil on the stovetop and seared the onion quarters at a high heat. Removing the onions, I then seared all the sides of the roast. Getting a nice caramelized surface on the meat is important to both the look and flavor of the finished roast.

When all sides have been seared, I removed the roast and added 3⁄4 cups of a good red wine to deglaze the pot. I added the onion quarters back to the pot and place the roast on top and I included three bay leaves. I covered the pot with a tight lid and placed it in a 300-degree oven for about an hour.

Earlier I had made French bread dough in my bread machine to save my having to do all the kneading. So, I shaped it into two loaves and let them rise while the roast cooked. I also made basil pesto to serve with the bread or to garnish the roast. Then I prepared the smashed potatoes I’d be serving with the roast and cleaned Swiss chard for a side.

After an hour the roast’s internal temperature was at 135 degrees. I put it back in the oven for another 15-20 minutes until it came to 155 degrees. I let the roast rest for a full 30 minutes to make it easier to slice very thin. I baked the French bread and wilted the chard in olive oil with onions, garlic and red pepper flakes.

The roast was very tasty. It was not as tender as a better cut of meat would have been, but it wasn’t like eating shoe leather either. Slicing it very thin against the grain and serving it with its own pan sauce made for a rather tender chuck roast.

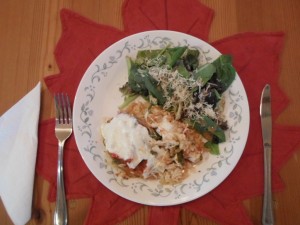
Chicken and rice

Chicken and rice

Chicken and rice is a classic dish. Most versions use some kind of creamy soup. Since I’m trying to avoid processed foods that may contain chemicals and preservatives, I’m using my own canned pasta sauce. If you haven’t started canning yet (just kidding, I’m a novice), you could substitute store-bought cans of fire-roasted tomatoes or the pasta sauce of your choice. I’m also trying to make lighter dinners that are quick and easy to clean up. This recipe is lower in fat and only gets two pots dirty.

I set out 4 boneless, skinless chicken breasts to thaw while cooking enough rice in low-fat, low-sodium chicken broth to make 8 cups. Choose any kind of rice you like. Then thinly slice two large onions and 3-4 bell peppers. In an oven-safe pan, sauté the onions and bell peppers in 2 tablespoons of olive oil on the stove-top. Always lightly salt and pepper to bring out the flavors. Add 2-3 cloves of minced garlic and cook for another minute. Scoop the vegetable mixture into the pot of rice and stir together.

Return the empty pot to the stove and add olive oil to the pot if needed. Slice each chicken breast horizontally – there will be 8 thin pieces. Season both sides with Creole seasoning or just salt and pepper if you prefer. Sear the chicken breasts on both sides in the hot oil. Since the chicken is thin, it cooks very quickly. Remove the chicken to a plate.

The oven-safe pot may have some stuck-on pieces of chicken or vegetable, so deglaze with 1⁄2 cup of white wine or chicken broth. Scoop the rice mixture into the pot and then nestle the 8 pieces of chicken on top of the rice. Pour a quart jar or 30-32 oz. of pasta sauce on top of all. When I made my jarred sauce, I seasoned it. If you are using store-bought sauce, taste and make sure it is properly seasoned. Add salt or pepper now if necessary.
Slice or shred 6-8 oz. of low-fat mozzarella or Monterey jack cheese. Evenly top the sauce with cheese. Cover the pot and bake in a 350 degree oven for 15 minutes. Remove the lid and bake for 10 minutes more or until the cheese is melted and the sides are bubbling. (While dinner baked, I cleaned up the kitchen.) Let the pot sit while preparing a simple side salad and serve with low-fat dressing or your own homemade vinaigrette.

Since I’m trying to be more aware of my intake, I considered a serving to be 3/4 cup rice and 1 thin piece of chicken. The sauce and cheese make the dish taste hearty and the salad helps to fill the plate. This dish allows my husband and me to eat lighter while my son Ben, who certainly is not on a diet, will have plenty for seconds. After dinner, I put away leftovers, loaded the dishwasher and hand-washed the remaining pot – light, quick and easy.

Savory Tomato Crumble

Tomato crumble

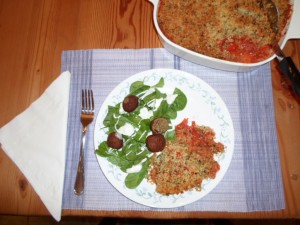
Apple or other fruit crumbles are dessert favorites, but how about a savory tomato crumble for dinner? I ran across a recipe for one in a baking catalog and it looked interesting. It appeared to be a little bland – no onions, thyme, oregano – so I decided to rev it up with my own version.  

Caramelized onions add richness to most savory dishes so I started with about 2 tablespoons of olive oil and 2 tablespoons of butter heating over medium heat in a large pot on the stove. I thinly sliced 3 medium-sized onions and added them with salt and pepper to the pan. Don’t let the onions burn, but instead slowly cook over lower heat and stir occasionally to make sure they are not sticking. After about 15 minutes, add a bay leaf and about 1 teaspoon each of dried thyme and oregano.  

As the onions continue to cook, dice 3 garlic cloves and chop 10-12 medium-sized tomatoes with skins removed. After the onions have cooked for about 30 minutes, they should be a nice brown color. Stir in the garlic and tomatoes. Add about 3 tablespoons of flour, 1 tablespoon of brown sugar and stir. Reduce the heat to low and let the pot simmer for about 20 minutes, stirring occasionally. Taste for seasoning and add salt if needed.

Remove the tomato mixture from the heat and incorporate about a pint of cherry tomatoes or tomatoes chopped into bite-sized pieces. Spray a shallow casserole dish with cooking spray and pour in the tomato mixture.  

For the crumble topping, mix together 2 cups plain bread crumbs, 1⁄2 cup grated Parmesan cheese, 1 tablespoon dried parsley flakes and 1 stick melted butter. Spoon the crumble over the top of the tomatoes in an even layer. Cook at 375 degrees for 20 minutes, until the topping is lightly browned. Remove from the oven and let cool for at least 10 minutes before serving.  

I served the tomato crumble with a spinach salad for Sunday night’s dinner. This recipe is a keeper and would also go well as a side dish for baked fish – I’m thinking salmon.

Rosemary crusted pork loin – while canning pasta sauce

Pressure canning

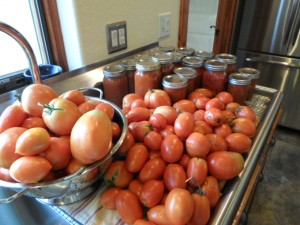
Pressure canning is something I have always wanted to do. I’ve pickled vegetables and processed them with the water-bath method, but the ability to preserve food without all the vinegar and salt seemed out of my reach. That is until I purchased a used pressure cooker/canner. What makes it even more interesting to me is that it once belonged to centenarian Hazle Terry. Hopefully, I can do as well with it as she.

So far I’ve processed tomato quarters and hot salsa. Pasta sauce was next on my list. I knew the effort would take a few hours since I needed to remove the tomato skins by boiling them in water and peeling as well as allowing the tomatoes to simmer with onions, garlic and savory herbs before pressure canning.

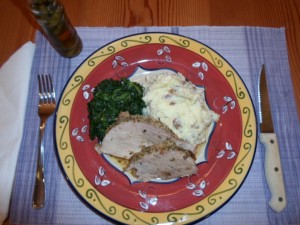
Since I was going to be in the kitchen heating up the house anyway, I decided to cook the huge pork loin my husband picked up when he offered to get the groceries – it’s been a busy week. I was thinking a small one-pound loin would be nice for a dinner, but like most men – go big or go home – he bought almost four pounds of pig. Actually he did very well; it was a beautiful roast.

While water started to boil for the tomatoes, I set the oven for 350 degrees and seared on the stove-top all six sides of the pork loin – that included the ends. Placing the loin in a roasting pan with the fatty side up, I salted and peppered and spread rosemary pesto all over the top of the loin. (Rosemary pesto is a paste made with rosemary, garlic, walnuts, olive oil, parmesan, salt and pepper. Made up in 4-oz. container portions, it can be frozen and used as needed.) I also sprinkled panko bread crumbs on top of the loin and drizzled it with olive oil. It already smelled good.

Because of its size, that loin was going to need to cook for almost two hours. So into the oven with the timer set for 45 minutes. Then I began processing tomatoes. After 45 minutes, I made a tent with foil and placed it loosely over the roast. This keeps a little moisture in and more importantly, keeps the rosemary pesto from browning too much. Back into the oven and set the timer for another 45 minutes.

By this time the tomatoes have been peeled; onion and garlic have sautéed in a huge pot; the pot has been deglazed with a little red wine; herbs, seasonings and tomatoes have been added; and the sauce is simmering nicely. And I needed to decide what to serve with the loin for dinner. Potatoes or rice came to mind and I decide on potatoes since I still had a few left and rice will keep. I made the smashed potato recipe from last week’s Leader and since I had so much going on, I just popped frozen spinach into the microwave. Both are quick and easy.

After the second set of 45 minutes had passed, I pulled out the loin and checked the internal temperature with a meat thermometer. I was looking for 160 degrees and we weren’t there. I ended up cooking the loin for another 30 minutes before reaching 162 degrees. I let the meat rest for about 20 minutes before slicing.

The rosemary pesto and panko bread crumbs made a flavorful crust over the meat that was moist and perfectly seasoned. The smashed potatoes and spinach paired nicely with this incredible roast. I still need to pressure can the jarred pasta sauce and it looks like we’ll be having pork loin for a few more meals.

Pork loin

Steak, smashed potatoes and caprese salad

stk pot caprese

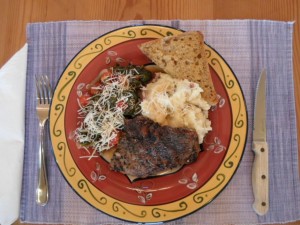
Labor Day and grilling just seem to go together – like meat and potatoes. Labor Day weekend always falls around my husband’s and my anniversary since we were married on September 1. It has been 29 years and we are still celebrating. This year I made steaks on the grill and smashed potatoes with rosemary and garlic. Then I decided to cool things off with my spin on a caprese salad. Caprese (pronounced kah-preeh-zay) salad is made with ripe tomatoes, mozzarella and fresh basil.

The steaks came from trading vegetables with a neighbor who raises Black Angus beef cattle – definitely one of my better trades. Those steaks are so good you don’t need to do anything to them. I let them come to room temperature on a plate with a splash of olive oil, salt and pepper while the grill pre-heated and I started the potatoes boiling.

To make the smashed potatoes, cut skin-on red potatoes into 1-inch cubes, throw in three smashed garlic cloves and a sprig of rosemary. Add just enough cool water to barely cover the potatoes and bring to a boil. As soon as the water boils, add salt, put on the lid and reduce the heat. Simmer for 15 minutes or until the potatoes are fork-tender.

I had a bag of fresh spinach that was going to get slimy if I didn’t use it soon, so I decided it would be part of the salad. First sauté onion and garlic in olive oil – they seem to be part of all my meals anyway. Season with salt, pepper and red pepper flakes. Then add about two cups of cherry tomato halves along with a splash of balsamic vinegar to the pan. I threw in the entire bag of spinach and 1⁄2 cup chopped basil. Toss the ingredients around so the oil and vinegar coat everything. \Put the lid on the pan and turn the heat off, letting it sit to wilt the spinach while working on the rest of dinner. The idea is to have tomatoes that are just heated and spinach that is slightly wilted. Don’t overcook it!

When the potatoes are finished boiling, strain them, remove the stick from the rosemary and let sit while the steaks go on a medium-high heated grill. Be sure to set the timer if you can’t watch the steaks. I usually set the timer for four minutes – it goes by fast and 5 minutes pass by the time I actually go outside and check the grill.
Meanwhile mash the potatoes and heat 1⁄2 stick butter and a cup of buttermilk or fat-free Half&Half in the microwave. It is best to add warm liquids to hot potatoes.
The buzzer is going off, so turn the steaks. Set the timer again – another 4 minutes. Pour the warmed liquid into the potatoes and continue to mash. Add salt, pepper or more liquid until the taste and consistency of the potatoes are perfect.

We like our steaks medium-rare and they are usually ready after 5 minutes on each side. It will depend on the thickness of the steak and cooking preferences. Remove the steaks and let them rest covered with foil for at least 10 minutes. A pat of butter placed on top while it rests makes the steak extra special – especially on an anniversary.

When serving, don’t forget to add shredded mozzarella to the caprese salad. I added a little to the potatoes too. Why not?

Rosemary Bread Recipe

In a large mixing bowl, dissolve 2.5 teaspoons of yeast and 1 tablespoon of sugar into 2 cups warm water. When the yeast mixture is frothy, add 2 cups of flour and stir. Then add 2 teaspoons kosher salt, 2 teaspoons of fresh chopped rosemary and two more cups of flour. Stir until blended – do not knead. Cover with a moist towel and let rise for an hour.

Flour the work surface and scoop the sticky dough out of the bowl and onto the surface. Cut the dough in half and start kneading. I usually end up adding about a half a cup of flour more to each half of dough while kneading. Form two mounds and place them on a cookie sheet that is lightly coated in olive oil and sprinkled with corn meal. Cover with the moist towel and let rise for another hour.

Brush each mound with olive oil and sprinkle lightly with more chopped rosemary and sea salt. Bake in a 425 degree oven for 10 minutes. Then reduce the temperature to 375 degrees and bake for 15 minutes more.