Rueben Panini Sandwiches

Rueben panini-1

There was a lot of activity at our little farm last week. Planting bare-root vines, watering them in and tilling the garden patches kept us very busy. So when it came to preparing dinner, I kept it quick and simple. I have to give Earl Hill credit for the Rueben sandwiches in this week’s article since he made them once for a Leader lunch.

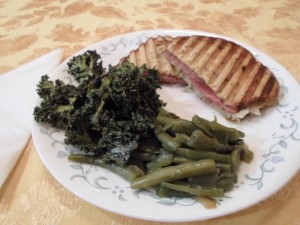
I made Ruben panini sandwiches, green beans (another effort to regain freezer space) and kale chips (in an effort to clear the garden of tired plants and prepare for spring tilling).

Rueben Panini Sandwiches
2 Tbsp. butter, melted
8 slices rye bread
1 package sliced roast beef lunchmeat
6 ozs. Swiss cheese, sliced
Thousand Island salad dressing
Sauerkraut
(makes 4 sandwiches)

Heat a panini press to high. If you don’t have a panini press, substitute an iron skillet and a clean brick covered with aluminum foil.

Slather one side of rye bread with Thousand Island dressing. Place Swiss cheese slices to cover the bread. Layer roast beef slices on 4 pieces of rye and sauerkraut on the other four. Put each half together and butter the bottom of the four sandwiches.

I laid two sandwiches at a time on my press. Butter the top of each and then gently close the lid. After 3-4 minutes, lift the lid and check the sandwich. The rye should be golden brown and the cheese should be melted and oozing out the sides.

If using the iron skillet-brick method, lay the sandwiches on the hot skillet and gently place the brick on top. After 3-4 minutes, flip and cover again with the brick, cooking for an additional 3-4 minutes.

Green Beans
Sauté 1 chopped onion in bacon grease (reserved from another night when we had breakfast for dinner). Then I added the thawed gallon bag of green beans and enough chicken broth to almost cover. Put a lid on the pot and cook until the beans are heated. Add salt and pepper as necessary.

Sausage and Rice Casserole

Sausage and rice casserole

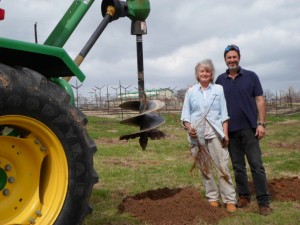
Last weekend was a busy one on our little farm. We added three more rows to the vineyard – 102 more vines. David drove the tractor with the 18″-auger while I helped set the auger and cleared dirt at each hole. Then I planted each vine by creating a mound at the bottom of each hole, spreading the vine’s bare roots around it, backfilling dirt just to cover those roots and watering. As the water receded at each planting, my son Ben added more dirt and continued to water ensuring no pockets of air existed around the roots. Occasionally we’d hit a gopher hole and our water and dirt ended up somewhere down the hill.

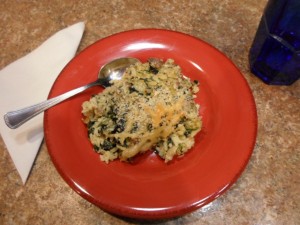
Needless to say, it was a very labor-intensive process that took all day Saturday and Sunday afternoon. When we came back to the house at 6:30 Sunday evening, it was dark and we were worn out – hungry too. After washing up, we headed to the kitchen and everyone pitched into make a delicious sausage and rice casserole.

Sausage and Rice Casserole
1-1/2 lbs. pork sausage
2 medium-sized onions, chopped
1 Tbsp. butter
8 oz. baby bella mushrooms, cleaned and quartered
3 cloves garlic
14 oz. frozen spinach, thawed
1 cup beef broth
8 oz. cream cheese
1 cup Half-&-Half (more if needed)
1 tsp. fennel seeds
1⁄2 tsp. nutmeg
6 cups cooked rice
8 oz. Swiss cheese, shredded and divided
1⁄2 cup bread crumbs
Salt and pepper

While my husband prepared the rice, Ben cooked sausage over medium-high heat in a large oven-safe skillet, breaking it into small pieces. I chopped onions, mushrooms and garlic. When the meat browned, I added onions and noticed the pork did not create much grease. (I bought this wonderfully tasty lean pork from a local farmer.) I added a Tbsp. of butter and as the onions cooked, they helped deglaze the pan. Then mushrooms were added, mixed in and allowed to cook on medium heat until nicely browned.

While Ben thawed the spinach in the microwave, I added garlic to the pan and cooked for about 2 minutes. Then I added beef broth, cream cheese, Half-&-Half, herbs and seasoned to taste. When the cream cheese melted, the rice, spinach and half of the Swiss cheese was added and stirred until well distributed.

Remove pan from heat, sprinkle bread crumbs and remaining cheese over the top. Bake in a 375-degree oven until lightly browned on top – about 20 minutes.

I’m not sure if it’s just because we were all famished, but the casserole smelled amazing, Ben said little but ate lots and David declared it to be awesome.

The recipe makes about 8 servings which is good because we love leftovers.

Clean-out-the-freezer Creole

Creole

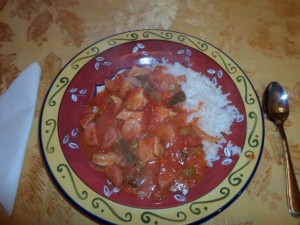
This time of year I usually start taking stock of my freezer-situation. It is still full of frozen okra, tomatoes, peppers, green beans, squash and eggplant. I also have boneless skinless chicken breasts and shrimp in there, so I decided to use some of it along with fresh ingredients to make a freezer Creole.

Freezer Creole
4 boneless skinless chicken breasts, cubed
2 Tbsp. oil
1-1/2 tsp. chili powder
2 small onions, chopped
2 carrots, chopped
3 celery ribs, chopped
1 bell pepper (or the frozen equivalent), chopped
2 cloves garlic, minced
1 quart whole tomatoes (or large can)
1 large can crushed tomatoes
1 pkg. Polska Kielbasa sausage, sliced
1 quart beef broth
1⁄2 gallon-bag breaded okra
1 small pkg. raw shrimp
Salt, pepper and Cajun seasoning to taste

Begin by searing the chicken in oil in a large pan, seasoning with salt, pepper and chili powder. Remove the chicken with a slotted spoon and reserve. The chicken will probably not be completely done, but it will finish later. Add onions, carrots, celery and peppers to the pan and sauté about 5 minutes. Add the garlic and cook for another minute.

Add whole and crushed tomatoes, breaking the whole tomatoes with your spoon and using the spoon to loosen any bits stuck on the bottom of the pan. Add the sausage, chicken and broth to the pan and simmer for about 15 minutes.

Add the breaded okra and bring the ingredients up to a soft boil. The okra breading will begin to thicken the Creole. Cook for 10 minutes. Taste and add salt, pepper and Cajun seasoning as necessary. Then add the shrimp and cook until it turns pink. This won’t take long – less than 5 minutes – and the shrimp will be done. Shrimp turns rubbery if cooked too long.

Serve over rice or with a slice of crusty bread. This recipe makes enough to feed 8-10 people. We made two dinners and a few lunches from that recipe – and the freezer is a little less full.

Chicken and Dumplings

Chicken and Dumplings

Chicken and Dumplings (C&D) – It is so good and so comforting when it’s so cold outside. There are many ways to make the dish and likewise, there are strong opinions regarding the proper dumpling, type of sauce and the addition of vegetables.

• First there is the dumpling dispute. Some like a thin strip of a dumpling, a little thicker than a noodle. Some prefer thicker biscuit dough rolled and cut into small rectangles. And still others prefer the doughy blossoms of dropped biscuits.
• The gravy seems to invite less of a conflict among partakers. Yet there are those who prefer a thin runny soup while others want to suspend their spoon in thick gravy. However, almost all agree it should be sprinkled with a generous amount of black pepper.
• It’s difficult to gain accord when it comes to the addition of vegetables. C&D purists demand only thickened chicken broth, dark-meat chicken and dumplings. Then there are the Moms who take the opportunity to sneak in vegetables like onions, celery, carrots and peas.

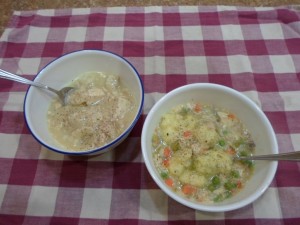
Sunday evening I made two versions of C&D – a simple purist version with rolled-biscuit dumplings and a chicken-vegetable stew with drop-biscuit dumplings.

Quick C&D
8 cups chicken broth
1 rotisserie chicken
1 can Grands biscuit dough
Salt and pepper, to taste
Bring chicken broth to boil in a large pot. Heavily flour a work surface and roll out biscuits to 1/8″ thickness. Then cut each into strips and across the strips into rectangles.

Drop the dumplings and excess flour into the boiling broth while stirring. Reduce heat and cook for 15-20 minutes. Stir occasionally to keep the flour from sticking to the bottom of the pan.

Debone the chicken and cut into bite-sized pieces. When the dumplings are done, add the chicken to the pot and season with salt and pepper.

Vegetable C&D
1 stewing chicken, cut into 8 pieces
Water to cover the chicken
Fresh herbs – parsley and sage sprigs, two bay leaves and peppercorns
1 onion, chopped
3 celery ribs, chopped
3 carrots, chopped
2 Tbsp. oil
Salt and pepper to taste

Cook the chicken in water with herbs. Meanwhile, sauté the vegetables with oil in a large deep pot. When the chicken is done (about 45 minutes), remove to cool and strain the liquid. Pour the liquid (broth – adding water if necessary to equal 8 cups) into the pan with the vegetables. Let simmer while deboning and cutting up the chicken.

Buttermilk dumplings
1-3/4 cups flour
1⁄2 tsp. baking powder
1⁄4 tsp. baking soda
1⁄2 tsp. salt
2 Tbsp. chopped parsley and/or chives
1⁄2 stick of butter
3⁄4 cup buttermilk
1 large egg

Prepare dumplings by combining the dry ingredients and cutting in butter. Then add the buttermilk and egg. Mix together to make a sticky dough. Bring the broth to a boil and drop the dough, one teaspoon at a time, into the liquid. Reduce heat and cook dumplings for 15-20 minutes. Add chicken to the pot and season with salt and pepper.

My family liked both recipes. I added frozen peas to the vegetable version right before I brought it to a boil and dropped in the dumplings.

I found the Quick C&D to be surprisingly good considering how easily it came together. I recommend adding chopped parsley but overall, it is a solid recipe.

Simple Enchilada Casserole

Events last week turned my small world upside down. My little two-year-old Beagle pup was badly mauled by another dog. She survived and is home requiring supervision until her wounds heal. Now a week later, I’m confident she will recover. However, life goes on and dinner must be made. I whipped up a simple enchilada casserole because it’s very quick and is a great leftover for those evenings when I don’t feel like cooking.

Simple Enchilada Casserole
1 lb. ground beef
1 onion, chopped
3 Tbsp. pan grease or vegetable oil
3 cloves garlic, minced
1 4.5-oz. can green chilies, chopped
3 Tbsp. flour
1 28-oz. can enchiladas sauce
2 15-oz. cans ranch-style beans
20 corn tortillas
12 oz. shredded cheese

Cook the ground meat until done and remove from pan to drain on a paper towel-lined plate. Discard all but 3 Tbsp. of the grease from the pan. Sauté onions in the grease until tender. Add garlic and chilies continuing to cook for a few more minutes.

Add flour to the pan and stir to make a roux. Cook until it is light brown – about the color of peanut butter. Add the enchilada sauce, ranch-style beans and ground beef to the pan and stir. The mixture should thicken and look like rich chili.

Grease a 9×13″ baking dish. Tear the tortillas into quarters and layer half on the bottom of the dish. Spread half the chili mixture and sprinkle half the cheese. Repeat.
Cook the casserole in a 350-degree oven for 35-40 minutes. Serve with a dollop of sour cream or Greek yogurt. Garnish with avocados, green onions, black olives or cilantro. Adding fresh elements enhances the meal.

Chicken Spaghetti – Lunch at the office

Leader lunch

Every Monday, the Leader employees share a sit-down noon meal. Everyone usually contributes something – components of the main dish, vegetable sides, salad or dessert – and we always pull together a wonderful lunch. The Leader has a very functional kitchen where the staff prepares the meal and it contributes to the family-type environment we are fortunate to have.

This week I contributed chicken spaghetti to the meal. I do not recall my mother ever making that dish. It wasn’t until after I married in the ’80s that I first had it at my in-laws. I suppose that’s a long time ago for some.
I made the casserole Sunday night, refrigerated it and baked it at the office the next day.

Chicken Spaghetti
3-4 boneless, skinless chicken breasts, cubed
3 Tbsp. oil, divided
1 onion, chopped
2 cloves garlic, minced
1 small can green chilies
1 tsp. oregano
3 Tbsp. flour
1 can mild Rotel tomatoes
2 cups milk
1⁄2 lb. Colby-Jack cheese, shredded, divided
1 lb. wheat spaghetti pasta
3⁄4 cup black olives, sliced
Salt and pepper to taste

In a large skillet, cook chicken seasoned lightly with salt and pepper in 1 Tbsp. of oil. Remove the chicken with a slotted spoon and set aside. Add 2 Tbsp. of oil to the pan and sauté the onions and garlic for about 5 minutes. Then add green chilies, oregano and flour. Stir to incorporate the flour and cook for about 3 minutes.

Add the Rotel tomatoes and milk. Continue to stir until the sauce thickens and then reduce heat to the lowest setting. Stir in about 3⁄4 of the shredded cheese. Taste and season with salt and pepper if needed.

In another pot, bring water to a boil. Add 1 lb. wheat spaghetti, breaking it into halves or thirds as it is added to the pot. Cook until almost done, about 8 minutes. Then drain.
Spray a 9×13″ baking dish with oil. Return the chicken to the skillet and add the black olives and pasta. Remove from heat and stir all together. Then pour into the baking dish. Top with the remaining shredded cheese.

Bake uncovered in a 350-degree oven for 30 minutes. The top should be lightly browned and the sides bubbly. We served it with steamed broccoli, rice and tomatoes, salad, bell pepper slices, cucumber slices and garlic bread.

Homemade Doggy Treats

Dog Treats 2

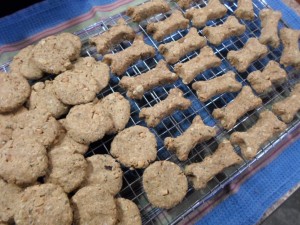
It was cold outside and Sally and I were stuck inside. We decided to make doggy treats. Ok, I made them and Sally watched – licking her lips!
Here’s the recipe.

Combine the following dry ingredients:
2 cups whole wheat flour
1 cup oats
2 Tbsp. chopped parsley
½ cup non-fat dry milk
½ tsp. salt

Then add :
2 large eggs
1 cup peanut butter
½ cup cold water

Mix together to form a dough – add 1 Tbsp. water if necessary.
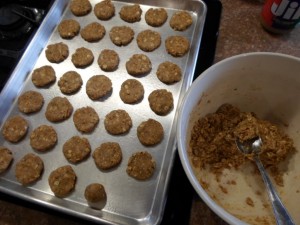
Using a heaping tsp. of dough, roll a ball and then flatten it – making a small round cookie. I also shaped some to look like bones. Place on a lightly greased baking sheet.
Bake in a 300-degree oven for 45-50 minutes. The recipe made 70 treats.

Dog Treats 1

Sally the farm dog

On Sunday, January 26, our 2-year-old Beagle pup was mauled by a neighbor’s dog. She had gone to visit her friend, a Great Pyrenees, when another dog – used for breeding and kept in a kennel at all times – got out and attacked Sally. The Pyrenees tried to pull Sally away from the other dog. A lot of damage was done before the owner of the breeder dog became aware and pulled his dog off Sally.
Sally hurt1
Sally lost a lot of blood and the emergency vet was afraid she would go into shock. So they kept her overnight on an IV until she was stable. The next morning, 17 hours after the attack, the vet worked for an hour repairing the damage. Sally came home Monday evening with stitches, drains in the nastier wounds, antibiotics and pain meds.

Thursday (4 days after the attack) Sally is resting easy.
Sally Day 4

The following Sunday (a week later), Sally is feeling pretty good. Her drains have been removed and she thinks she should be able to go out and run free. Not happening. We are keeping her wounds clean and hope the stitches will come out on Wednesday.
Sally wants to go

It’s hard to keep a good dog down.

Ragout of cannelli beans and tomatoes with white fish

Ragout

A ragout (pronounced ragoo) is a French hearty stew – not to be confused with ragu, the Italian sauce usually served over pasta. A ragout is usually made with beans or lentils, fresh vegetables and herbs. It can contain meat, but is still a hearty meal even if it is meatless.

Lately the media has expressed concerns with farm-raised fish processed in Asia. Overcrowding and polluted waters are some of the biggest concerns. For that reason, fish caught in local lakes are more appealing to me and at least I know what my family is eating.

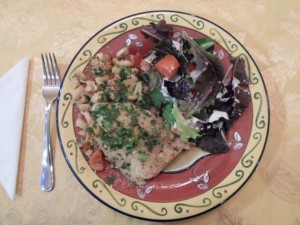
I usually make this dish with cannelli beans and catfish. My recipe is below, but feel free to use lentils or your favorite beans and substitute chicken or sausage for the fish. Obviously, served meatless with a side salad and crusty bread, it is a wonderfully nutritious meal.

Ragout of cannelli beans and tomatoes with white fish
3 15-oz. cans cannelli beans, rinsed and drained
4 Tbsp. canola oil
6 white fish fillets (catfish, tilapia, halibut)
2 medium onions, chopped
1 carrot, chopped
1 rib celery, chopped
6 cloves garlic, minced
3 slices bacon, chopped (optional)
1-1/2 cups dry white wine
2 cups chicken stock
2 tsp. fresh rosemary, minced
2 tsp. dried thyme
2 tsp. dried parsley
1 15-oz can tomato bits
1 lemon, zested and juiced
3 Tbsp. butter
Sea salt and ground pepper to taste
Fresh parsley, chopped for garnish.

Heat oil in skillet. Salt and pepper fish fillets and lightly brown in batches. Remove fish. Sauté onions, carrot, celery, garlic and bacon in remaining oil until tender. Then deglaze pan with wine. Add stock, herbs, beans and tomato bits. Cook until heated through.

Return fish fillets to pan and continue to cook covered on low heat for about 10 minutes more. Remove fish again and cover to keep warm. Add lemon juice and butter to pan and cook the sauce for 20 minutes, allowing it to reduce.

Serve ragout with a slotted spoon and place a fish fillet on top. Drizzle ragout juices over the fish. Garnish with lemon zest and chopped fresh parsley. A side salad of organic greens is always a nice addition.