Blueberries, blueberries and more blueberries

BBerry Pie

Blueberries are my favorite fruit. I buy them fresh, frozen and dried to eat as a snack or with my morning yogurt. A few years ago I was at the grocery store looking at a high-priced package of the fresh berries, contemplating if they were worth it. A nice older gentlemen leaned over next to me and quietly said, “You know, you can grow those.” I laughed and said that I probably should.

That next spring, I bought four bushes from a local nursery and planted them. Three thrived and the fourth succumbed to an ant colony that I still can’t seem to get rid of. I didn’t expect berries that first year, but thought I’d get a few the second. I saw the flowers bloom, but no fruit. The third year, I picked about a handful and was pretty disappointed. I planted three more bushes of another variety because I had read that planting multiple types together is a good idea. I just can’t remember why.

Last year the first three bushes were big, beautiful and full of flowers, and a little later had green berries. I watched the berries dwindle over the passing weeks. I was stumped until the day I found several of my hens gathered around the bushes. They would fly up, flap their wings and beat at the bushes. When they landed, they quickly began to peck the ground below. My free-to-roam-where-they-please chickens were eating all of my berries before they even had a chance to ripen. No wonder their yolks are a deep orangey-yellow.

This year I wised up and pounded in T-posts and wired goat fencing to completely enclose the bushes. I am pleased to say that as of yet, no chickens have scaled the fence, and the wild bird population hasn’t damaged much.

A week ago I picked 3.5 pounds of berries from those first three bushes. Last weekend, my son picked 8 more. There are still ripening berries to be picked.

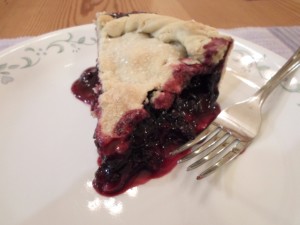
I froze a gallon bag and I also made a large blueberry pie. It was so large I ended up cooking it in a casserole dish.

Blueberry Pie
6 c. blueberries, rinsed and dried
1 c. sugar
1/3 c. flour
1 tsp. Kosher salt
1 tsp. fine lemon zest
1 Tbsp. freshly squeezed lemon juice
2 Tbsp. cold butter, cubed

In a large bowl, stir together the blueberries, sugar, flour, salt and lemon zest. Let sit while preparing the pie crust (recipe to follow).

Refrigerate the dough for at least 30 minutes. Then place on a well-floured surface. Cut the dough in half and roll out the bottom pie shell first. Place dough in pie pan (or casserole dish) being careful to fill the pan without stretching the dough.

Pour the blueberry mixture into the shell. Drop cubes of butter evenly on top of the fruit and drizzle on the lemon juice. Then roll out the top shell. Drape over the pan and tear away extra dough, leaving 1/2 to 1 inch all around. Seal the top and the bottom shells together as you prefer. I like to gently twist and tuck the dough all around. When it comes out of the oven, the edge resembles a rope circling the pie.

I like to brush butter over the top and sprinkle with sugar. Then bake in a 375-degree oven for 20 minutes. If the crust is browning too quickly, put foil over the edges and cook for another 25 minutes. I checked my pie at that point and decided to add another 10 minutes. It probably needed more time because it was so large. When I pulled it from the oven, it was golden brown and the juices were bubbly.

Pie Dough
3 c. flour
1 Tbsp. sugar
1 tsp. Kosher salt
2 sticks cold unsalted butter, cubed
1/2 cup ice water

In a food processor, pulse the flour, sugar and salt a few times to combine. Then add really cold cubes of butter. Pulse until the mixture looks crumbly – about 12 times. Then drizzle in cold water while continuing to pulse until the dough clumps together. Drop the dough on a floured surface and gently press together to form a ball. Cover with plastic wrap and place in the fridge to rest.

We’ll have the rest of the berries for breakfasts and snacks. But I also really enjoy them in a spinach salad. Adding fruit to greens perks them up and can be a nice change.

Spinach and Berry Salad
5-6 c. fresh spinach, cleaned and torn
1/4 c. olive oil
1/8 c. balsamic vinegar
1/2 Tbsp. honey
Salt and freshly cracked black pepper, to taste
1 c. strawberries, cleaned and halved
1 c. blueberries, rinsed and dried
1 c. pecans

Place spinach in a large bowl. Whisk together olive oil, balsamic vinegar and honey. Pour over spinach and sprinkle with salt and pepper. Toss the spinach with the dressing. Top the salad with strawberries, blueberries and pecans. Shaved pieces of Parmesan cheese also make a nice salty-nutty addition.

*** Quotes from Julia Child ***
“A party without cake is just a meeting.”
“The only time to eat diet food is while you’re waiting for the steak to cook.”
“If you’re afraid of butter, use cream.”
“I think every woman should have a blowtorch.”

Posole – traditional New Mexico stew

Posole and cornbread

Lately I’ve been so busy trying to keep up with all my work and other obligations that I struggle to find the time to cook. That’s when it’s easiest to make a large roast and use portions toward several quick meals later in the week. I bought a huge pork roast. It must have been 6-7 pounds.

The evening before I planned to cook it, I rubbed it down with spices, wrapped it up and let it sit in the refrigerator overnight. The recipe for the rub follows. It makes more than you’ll need for one application and is also good with chicken and beef. Store unused rub in an air-tight container.

Spicy Sweet Rub
3/4 c. brown sugar
1 Tbsp. Montreal steak seasoning
1 Tbsp. Kosher salt
1 Tbsp. chili powder
1 Tbsp. garlic powder
1 tsp. cayenne pepper

Mix all ingredients together.

The next morning, I pulled the roast from the refrigerator and let it sit for about 30 minutes. Then I seared all six sides in a shallow pan until they were golden brown. I placed it in my largest crock pot without adding any liquid. Cooking on high heat for the first two hours brought it up to heat quickly. Then I turned the heat to low and cooked for 4 more hours.

When done, I let the roast rest for about 30 minutes before pulling off a portion to shred for pulled pork sandwiches. The roast made lots of juice. I mixed some with a thick barbecue sauce and dressed the shredded pork with it. Save the remaining juice for later use. Break the remaining cooled roast down into a couple of containers and refrigerate.

We had pork sandwiches and street tacos for several meals. Street tacos are so easy to pull together once the meat is cooked. Just reheat the meat, chop vegetables and shred cheese. Roll it all up in a tortilla.

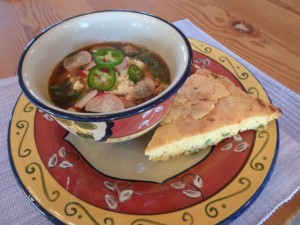
With the last portion of the roast, about 2 pounds, I made posole, a traditional New Mexico stew using hominy. My version is a little spicy and I serve it with cheddar cheese and jalapeño cornbread.

Posole
1 large onion, diced
2 green peppers, diced
1/2 jalapeño, minced
1 Tbsp. olive oil
2 bay leaves
3 cloves garlic minced
2 cans Rotel tomatoes
2 cans hominy
2 tsp. oregano
2 tsp. ground cumin
2 tsp. chili powder
8 c. beef stock (or combine beef stock with leftover pork juice to equal 8 cups)
2 lbs. cooked pork roast, shredded
Salt and pepper to taste

Sauté onion and peppers in olive oil with a pinch of salt and pepper. Add bay leaves and garlic and cook for about 2 minutes. Add tomatoes, hominy and remaining spices. Cook while stirring until the ingredients are incorporated and fragrant. Add stock and shredded pork and bring to a boil. Taste and adjust seasonings. Then turn down the heat and simmer for 45 minutes to an hour.

Garnish the stew with sliced radishes, jalepeños, chopped cilantro and crumbled queso fresco. I also served with cornbread and our favorite is to add minced jalapeños and cheddar cheese. One can easily make the cornbread batter from scratch but if in a hurry, a mix purchased at the store speeds things up. I followed the directions on the back of two packages of mix and added 2-1/2 minced jalapeños along with a cup of shredded cheddar cheese.

Be sure to place about a Tbsp. of vegetable oil in a cast iron skillet and preheat at 400 degrees for about 7-8 minutes. Remove the screamin’ hot pan from the oven and pour in the batter. It’s perfect when the batter begins to fry as you pour. Return the skillet to the oven and cook as directed on the package or 20-25 minutes until the top is golden brown.

For a less spicy version of posole, skip the jalapeños and substitute tomato bits for the Rotel.

Spaghetti Squash

Spag Squash

On Sunday, I was finally able to work in the garden. I certainly said a prayer over each pathetic root-bound seedling I transplanted. Hopefully they will grow strong enough to survive the heat – and the rabbits.

One of my neighbors read about my gardening woes this year and brought me zucchini and spaghetti squash. One of the easiest ways to cook spaghetti squash is in the microwave.

Place the whole squash in the microwave and heat on high for 1-2 minutes. This will soften it and it will be easier to cut in half. Remove the seeds and place the halves cut-side down on a dish. Add a little water and cover with plastic wrap. Microwave each half for 6 minutes or until the squash yields to the pressure of a finger. Cool until it can be handled and remove the flesh with a fork, separating the strands.

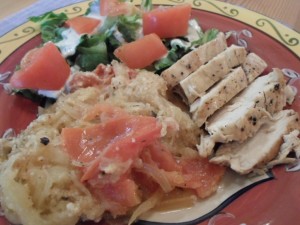
Once cooked, many just add marinara or another type of sauce. That is certainly good, but one can be more creative. Spaghetti squash is a very versatile vegetable.

Warm Squash Salad
1 large spaghetti squash, prepared
1 Tbsp. butter, melted
1 Tbsp. olive oil
1 large tomato, diced
2 green onions, thinly sliced
1 clove garlic, minced
1/4 c. grated Parmesan cheese
Salt and pepper, to taste

Toss all ingredients together and serve warm.

Spaghetti Squash Frittata
1/2 bell pepper, thinly sliced
1 onion, thinly sliced
1 c. spaghetti squash, prepared
2 tsp. fresh basil, chopped
1/2 tsp. salt
1/4 tsp. pepper
1 tomato, sliced
4 eggs
1 tsp. dried oregano or basil
Parmesan cheese

Toss pepper and onion slices with squash and seasonings. Spread on the bottom of an 8″ greased pie pan. Lay tomato slices on top. Whisk the eggs and pour over the vegetables. Push the vegetables down to ensure most are covered by the eggs. Sprinkle dried herbs over the top. Bake at 350 degrees until set. Sprinkle the top with freshly grated Parmesan cheese and serve.

Another idea is to pile the squash with cheese, minced garlic, crumbled bacon pieces, salt and pepper on large portabella mushrooms. Bake until the mushrooms are soft.

And just one more, toss hot squash with wilted spinach, caramelized onion, garlic and bacon. Dress with olive oil and balsamic vinegar.

Pizza on the Grill

Pizzas from grill

I believe it is officially grilling season, although I am willing to grill all year long. I perfected this week’s recipe when I lived in the mountains of Evergreen, Colorado. I think it was in 2003 during Winter Break with guests in the house when 10 feet of snow fell and the power was off for over four days.

I could light the gas burners with a match and that worked for most dinners, but I wanted to cook individual pizzas and the oven was electric. I had planned a pizza party one of those nights and I had heard of cooking pizzas on the grill, so I decided to give it a try.

Pizza Dough
1-1/2 c. warm water
2 tsp. yeast
2 tsp. sugar
4-1/2 c. flour
2 tsp. salt
2 Tbsp. olive oil

Dissolve yeast and sugar in water. Add half the flour and start to mix with a wooden spoon or by hand. Then combine the salt with the remaining flour and add to the mixture. Drizzle in the olive oil. Keep trying to mix by spoon or hand but when it gets too difficult, plop it on to a floured counter top and knead for about 5 minutes until the dough is smooth. Wrap it in plastic and refrigerate for about 30 minutes. That recipe makes 4 10-inch pizzas. I just rolled it out with a rolling pin.

Quick Pizza Sauce
1 large can crushed tomatoes
2 tsp. Italian seasoning
2 tsp. sugar
1/2 tsp. pepper
1 tsp. salt
1 Tbsp. tomato paste
1 tsp. dried basil

Heat the crushed tomatoes in a small pot. Add Italian seasoning, sugar, pepper and tomato paste. Cook on medium heat for at least 10 minutes. The sauce will reduce a little during that time. I tasted it and decided to add the dried basil.

I worked at Pizza Hut in high school and was an assistant manager during two years of college. At that time, there was a rank one could achieve of Pizza Hut Professional, and I still consider myself to be one. I’m kidding around, but it is important to know what you’re doing because using the right amount of sauce keeps the pizza from being too dry; too many wet toppings make the dough soggy; proper layering of ingredients and the use of cheese help provide the glue to hold it all together.

So to grill pizzas, dust a pizza peel with cornmeal, roll out one pizza shell and lay it on the peel. Outside on a medium-heated grill, slide the shell off the peel. While it cooks, roll out the next one and slide it onto the grill as well. Watch closely. When grill marks start to show and the shell is easily flipped over, do so. Grill the other side. If a bubble starts to show, pierce it gently with a metal spatula. Cook the rest of the shells and bring inside for guests to top.

Start with the sauce and spread evenly up to 1/2-inch from the edge. Sprinkle a handful of cheese over the sauce. Layer on flat meats like pepperoni, sliced ham and/or Canadian bacon. Then sprinkle on the vegetables keeping in mind that too many can make the pizza soggy. Crumbled meats like cooked ground meat and pork go on top of the vegetables. Then to hold it all in place, sprinkle on another handful of cheese. Back in the day, we sprinkled on something called Fairy Dust, but just in case that’s still a secret, I won’t describe exactly how it was made. However, doesn’t a little grated Parmesan and a pinch of dried oregano sound like a good finishing touch?

Scoop the topped pizza shell onto the peel and slide on the grill again. This time, close the lid to hold in the heat. Check often and since everything is already cooked, it’s done when the cheese has melted and the crust is golden. Just keep a close eye on the bottom of the shell so it doesn’t burn. Adjust the heat as necessary.

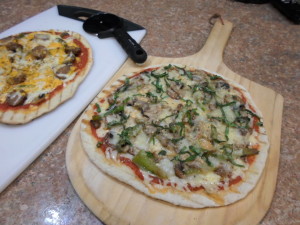
I made grilled pizza Sunday night for dinner. I sautéed mushrooms, onions and green peppers for the topping and cooked Italian sausage. When cooking on the grill, it doesn’t stay in the heat as long as an oven, so pre-cooking those toppings is best. After I removed the pizzas from the grill, I topped mine with freshly chopped basil.

Obviously pizza shells and sauce can be purchased at most grocery stores, so if you don’t have time to make it from scratch, don’t let that stop you from making your own pizzas at home, using the ingredients you like best. Kids like to make their own and do-it-yourself pizza is fun at a party. Just prepare shells ahead of time, lay out toppings and let the guests create their own. Then someone just needs to man the grill and finish cooking them.

Swedish Meatballs

Swedish Meatballs

Every year I plant a large garden. I usually order my seeds in February and when they come in, I sort them by those that will be directly sown into the soil and those that I’ll start in pots in the greenhouse for transplanting later. Of those seeds for transplanting, I sort by the number of weeks recommended to start before transplanting. It’s not real complicated; it just takes planning.

With the rainy weather, I’ve delayed transplanting and I’ve not planted any of the direct-sow seeds. My garden is too soggy to till by tractor or with the hand tiller, so last Saturday I used a broadfork to loosen the soil. (The joke is that a broadfork is a fork powered by a broad, budda-budda-ching – enough poorly executed slapstick.) It took about 30-45 minutes to turn up each row; another 30 minutes to further loosen the soil and remove weeds by hand; and finally prepare mounds for planting.

Although it is slow going, I have planted most of the tomatoes and the spaghetti squash started from seed. In fact, I had just planted the last squash when large rain drops started to fall. By the time I loaded the cart with tools, the rain was coming down hard. I felt a sense of accomplishment at having finally started planting. Hopefully those plants won’t drown and rot in the ground.

I still have more squash, eggplant, okra and peppers that need transplanting. I have even more to directly sow, but beginning feels good.

While the rain pounded down outside, I started dinner and was thankful to be safe, dry and warm inside. One of my husband’s favorite dinners is Swedish meatballs and it seemed to be the perfect comfort-food choice to end the day.

Swedish Meatballs
3 Tbsp. olive oil, divided
1 onion, small diced
2 cloves garlic, minced
1-1/2 pound ground beef
1 pound ground pork
3/4 c. breadcrumbs (I prefer Panko)
2 eggs
1/4 tsp. ground allspice
1/4 tsp. ground nutmeg
1/2 Tbsp. Kosher salt
1 tsp. black pepper

Gravy:
5 Tbsp. butter
1/2 c. all-purpose flour
5 c. beef broth
1 c. sour cream
Salt and pepper, to taste
3 Tbsp. fresh parsley, chopped

Heat 1 Tbsp. olive oil in a large heavy-bottomed skillet over medium heat. Cook onion and garlic until the onions become translucent. In a large bowl, combine beef, pork, breadcrumbs, eggs, allspice, nutmeg, cooked garlic and onion, salt and pepper. Mix well until all the ingredients are combined. Roll meatballs that are about 1-1/2 inches in diameter. I counted 28 meatballs rolled.

Add remaining olive oil to the skillet. Cook the meatballs in batches, allowing plenty of room to roll them around and brown all sides. Remove and let drain on a paper towel-lined plate.

Drain the grease from the skillet and wipe clean with a paper towel. To make the gravy, melt butter in the skillet. Whisk flour into the butter and cook until lightly brown. Gradually stir in the beef broth continuing to whisk until slightly thickened. Reduce heat and add the meatballs.

Cover and simmer for about 20 minutes. During that time, cook egg noodles, rice or potatoes to serve with the meatballs and gravy. Check on the meatballs occasionally while they simmer and stir.

Turn off the heat and move the meatballs to the side of the skillet. Whisk in the sour cream and gently stir the contents to combine. Work carefully so the meatballs don’t fall apart. Garnish with chopped parsley and serve.

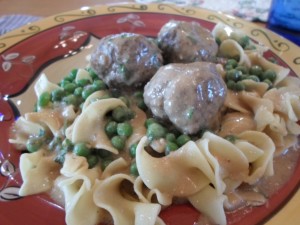
I love fresh green peas, but frozen are a close second. I microwaved a bag of frozen peas and served them with the meatballs and gravy over egg noodles. We really enjoyed dinner and had leftovers for lunches. And the rain continued to fall.

Sunday on our way to church, we saw three men fishing for catfish on the bridge at Elm Creek. I’ve seen people fishing at the bridge on FM 514, but never far upstream on our little road. Fishing must have been pretty good too because they showed us a really large catfish they had just caught. When life gives you lemons, make lemonade.

Farm fare

Egg Casserole

Both of my parents grew up on Texas farms. My dad’s family had a farm in the Abbott area. In fact, he went to school with Willie Nelson. Although Wilson is a few years older, my dad remembers him and his sister performing in school talent shows. He has other fond memories of the farm where he and his five brothers and sisters grew up.

One of the most surprising things to me is how he talks about having creamed turnips for dinner. He just loved them. What he leaves out is that at times, it was probably all they had. Yet he always smiles when he remembers how good they were. I like turnips, but I prefer them roasted with olive oil, garlic, herbs, salt and pepper.

My mother grew up on a small farm in Westphalia, south of Waco. Her daddy died when she was 14, leaving her mother and four children to work the farm. Since my mom was the oldest and the youngest were very small, she remembers it as hard work in a harsh environment.

Meat on their table was a rarity. Vegetables from the garden, eggs and perhaps some milk from the cow were the common fare. In fact, during winter months, a scrambled egg was breakfast, lunch and dinner.
Growing up, I was taught to appreciate whatever my mother made for dinner. She is a terrific cook and I don’t remember refusing to eat anything she made. Although I never really liked it when she cooked liver, you can bet I ate it without a word of complaint.

Currently, children seem to gripe about what they are served and I have trouble understanding it. Sometimes I think they don’t know what it means to be hungry. Anyway, the next two recipes are tasty main dishes commonly found on a farm table. Since modern-day dinners usually include meat, they also make great side dishes.

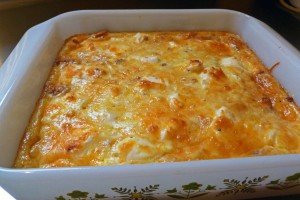
Egg and Onion Casserole
1 large sweet onion, coarsely chopped
3 Tbsp. olive oil, divided
5 slices of leftover bread, 1” thick
1 cup bread crumbs
1/2 cup grated cheese, Swiss or white cheddar
3 Tbsp. flour
1 Tbsp. butter
1 cup chicken broth
1 cup milk
1/2 tsp. salt
1/4 tsp. black pepper
6 hard boiled eggs, sliced

Sauté the onion in a Tbsp. of olive oil until soft and beginning to turn brown. Remove from the skillet. Make a white sauce by heating 2 Tbsp. of olive oil butter, flour, broth and milk. Stir until thickened and add salt and pepper. Set aside.

Fit bread slices into a 9×9″ baking dish. Brush with a little more olive oil. Spoon about 1/3 of the white sauce over the bread. Arrange the onions over the bread and then layer the eggs. Pour on the remaining sauce and spread evenly.

Mix the cheese with the bread crumbs and scatter over the top. Bake in a 350-degree oven until bubbly and the topping browns. Let sit for about 20 minutes before serving. It also reheats well.

Eggplant Casserole
1 eggplant, cubed
1/2 cup bell pepper, diced
1/2 cup onion, chopped
1 rib celery, chopped
1 garlic clove, minced
1 Tbsp. olive oil
2 cups crumbled cornbread
14.5-oz. can diced tomatoes
1/4 cup fresh parsley, chopped
1 tsp. each thyme and oregano
1/2 tsp. salt
1/4 tsp. black pepper
8 oz. cheese, grated and divided
2 eggs, beaten
1/4 cup broth or water

Prepare a 2-1/2 quart casserole with cooking spray. Bring two quarts salted water to a boil. Add eggplant and simmer until soft. (Squash could be substituted for eggplant.) Drain well.

Sauté the next four ingredients in the olive oil until soft. Scatter the herbs over the crumbled cornbread. Toss in the sautéed vegetables. Add salt and pepper. Stir in eggplant, tomatoes and half the cheese. Stir eggs into the broth or water and pour over the mixture. Stir to combine. The casserole should be moist, but not soggy.

Place into the prepared dish and bake for 40 minutes in a 375-degree oven. Remove from the oven and scatter the remaining cheese on top. Return to the oven and heat until the cheese melts and is slightly brown.

Jelly and Jam

Jalapeno Jelly

Last weekend I went to the Sulphur Springs Farmers’ Market looking for inspiration for this column. It seems that other farmers are struggling with their gardens this year too. The only produce I saw was a handful of salad greens in one booth. I have those in my own garden and didn’t feel moved to purchase them.

I spoke with one of the ladies selling canned fruits, salsa and pickled items. She usually has produce too and agreed that her garden just wasn’t making anything yet. I noticed her jalapeño jelly. I had been meaning to make some, but just hadn’t gotten around to it. I spoke with her about the recipe and I bought a jar.

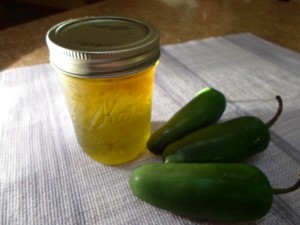
While I didn’t find interesting fresh produce, I still found inspiration. I love that jelly on hot buttered cornbread and it’s also good poured over cream cheese and served with crackers or chips. The recipe is very simple. Be sure to wear gloves when working with the jalapeños or your hands will sting for hours afterward.

Jalapeño Jelly
1 lb. jalapeño peppers
2 c. cider vinegar, divided
6 c. sugar
1 pkg. liquid pectin
2 drops green food coloring (optional)

Clean peppers removing stems and most of the seeds. Process with 1 cup cider in a blender or food processor until jalapeños are less-than-pea-sized pieces.

Pour into a pot along with the rest of the vinegar and sugar. Bring to a boil and stir constantly for 10 minutes. Stir in liquid pectin and bring back to a hard boil for 1 minute continuing to stir.

Remove from heat and skim any foam off the top. Drop in food coloring if desired – it really makes the jelly pretty – and stir until distributed.
Ladle hot jelly into jars leaving 1/4-inch headspace. Place the lids and process in a boiling water bath for 10 minutes.

I volunteer with a woman who gave me a jar of her strawberry jam. She said she makes it every year when stores are selling strawberries at a good price. She recommends it on top of ice cream, but it sure is nice over buttered toast.

Strawberry Jam
2 quart containers strawberries
1/4 c. lemon juice
7 c. sugar
1 pkg. powdered pectin

Clean strawberries and remove the stems. Then crush them and combine with powdered pectin and lemon juice in a large pot. Bring to a boil and add sugar. Stir until the sugar dissolves. Turn up the heat and bring to a hard boil for 1 minute, stirring constantly. Remove from heat and skim off any foam.

Ladle into hot jars. Leave a 1/4-inch headspace. Place the lids and process in a boiling water bath for 10 minutes.

Flat-iron Steak Kabobs – Quick French Onion Soup

Grilled meat n veggies

This week, County Extension Agent Gowin writes about fungal diseases in plants. I have been fighting them in the vineyard, as well as on my roses and Indian Hawthorns. It seems I can’t get a break with the weather, and rain is in the forecast again.

However, I learned in a vineyard pest managment class that certain fungicides help heal disease injuries while others protect against fungal disease. In some cases, the two can be combined and sprayed together, healing the past and protecting for the future. As always, it is important to read and follow label instructions.

I have lots of grape clusters forming on the shoots that will soon bloom. Protecting them from fungal diseases at this point is critical. Once they flower, grapes are wind/gravity-pollinated and a successful harvest depends on healthy clusters, warm weather and less rain. Also at this time, the buds for next year’s crop will form. So conditions now impact next year too.

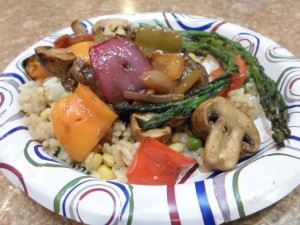
Obviously, I spend most of my time outdoors and I love to grill. Last week I marinated cubed flat-iron steaks, fruits and vegetables. Once skewered, I grilled them and served over rice.

Grilling Marinade
1/2 c. olive oil
1 lemon, juiced
2 Tbsp. Worchestershire sauce
2 Tbsp. balsamic vinegar
1 Tbsp. Dijon mustard
2 cloves garlic, minced
1 Tbsp. fresh rosemary, chopped
2 tsp. salt
1 tsp. freshly ground black pepper

Whisk all ingredients together.

I prepared a fresh pineapple and cut it into chunks. I made several skewers of pineapple chunks and cherry tomatoes.

Then I cut other vegetables into 1″ cubes. I marinated the cubed flat-iron steaks and vegetables in separate bags for about an hour in the refrigerator.

Once the marinade had its chance to impart great flavors, I started up the grill. While it heated up, I skewered the meat on separate skewers from the vegetables so the meat could cook longer. I used red, yellow and green peppers, a large red onion and a dozen button mushrooms cut into halves.

While the skewers grilled, I started a pot of rice. I also brought the marinade and onion pieces too small to skewer to a boil on the stove top, making a sauce to serve over the rice. It’s just important to make sure the raw meat juices are cooked.

Friends of ours came into town and stayed for dinner. That dinner is great for serving many and everyone can find something they like.

Another dinner that is easy and feeds many is soup and sandwiches. I made a simple version of French Onion Soup and grilled Swiss cheese sandwiches.

French Onion Soup
1/2 c. butter
4 onions, julliene sliced
2 cloves garlic, minced
1 bay leaves
1 tsp. dried thyme
3 Tbsp. Worchestershire sauce
3-4 Tbsp. flour
2 quarts beef broth
Salt and pepper, to taste

Melt the butter in a large pot over medium heat. Add the onions, garlic, bay leaves and thyme. Cook for 25 minutes or until the onions are soft and caramelized. Add the Worchestershier sauce and cook about 5 minutes more.

Discard the bay leaves. Stir in the flour, making a paste. Cook on low for about 10 minutes, cooking out the raw flour taste. Don’t let it burn.
Add the beef broth and stir while bringing the soup back to a simmer at medium heat. Taste and adjust seasonings. If the butter and broth were salted, you may not need to add more.

Flat-iron Steaks with Pan Sauce – Macaroni Bake

Steak

I know the rain is a blessing and I truly hope the lakes will soon be full. However, the fierceness in some of the storms we’ve had lately has been amazing. My plants, and especially my grape vines, are taking a terrible beating. Over the last week, I’ve worked to tie and re-tie vines to the trellis so they won’t be beaten against it by the next set of gale-force winds. I think I’ll be happy when April showers are over.

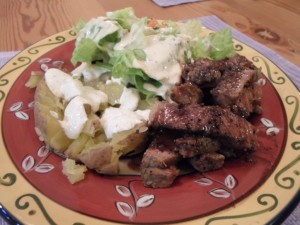
Otherwise, life on my little farm goes along as usual. Wednesday’s dinner was Ben’s to cook. He made flat-iron steaks with a pan sauce. And served it with microwaved baked potatoes and salad. His homemade Caesar salad dressing was a hit.

Flat-iron Steaks in Pan Sauce
4 flat-iron steaks
2 tsp. Montreal Steak Seasoning
2 tsp. olive oil
1 c. dry red wine
2 Tbsp. cold butter

Ben started by seasoning the steaks with Monteal Steak Seasoning while a cast-iron skillet heated on the stove. He wiped it with a little olive oil and as soon as it was screaming hot, he added the steaks to the skillet. He seared each side for 5 minutes, removed the steak from the skillet and let them rest under a foil tent.

Reduce the heat to medium and add wine. Simmer while stirring and scraping the browned bits on the bottom of the pan for about 6 minutes. Remove from heat. Stir in pieces of cold butter until melted. Season with salt and pepper if necessary.

Once the steaks have rested 10 minutes, cut thin slices across the grain and serve with pan sauce drizzled on top.

Homemade Ceasar Salad Dressing
2 tsp. garlic cloves, minced
3 anchovy fillets
1/4 c. olive oil
4 Tbsp. freshly squeezed lemon juice
2 tsp. Dijon mustard
2 tsp. Worcestershire sauce
1-1/2 c. mayonnaise
1 c. Parmigiano-Reggiano, grated
1/2 tsp. salt
1/4 tsp. black pepper

In a small sauce pan, heat olive oil and add anchovy fillets and garlic. Cook on low heat until the anchovies melt. The fishy taste will cook off and leave a rich nutty flavor.

Scrape the anchovy and garlic-flavored oil into a bowl and whisk in the rest of the ingredients. It makes a lot of dressing, but keeps for a week in the refrigerator.

On another evening, I made a macaroni bake with a few simple ingredients.

Macaroni Bake
1 pkg. Polska Kielbasa beef sausages, sliced
12 oz. elbow macaroni
10-oz. pkg. frozen mixed vegetables
2 c. chicken stock
1 lb. Velveeta cheese, cubed
1/2 c. Italian seasoned bread crumbs
drizzle of olive oil

Cook the elbow macaroni following the package directions until almost tender and then drain.

In the same pot, brown the sausages while microwave-cooking the frozen vegetables following the package directions. Add to the pot along with chicken stock. When it simmers, add the Velveeta and stir until the cubes melt.

Pour into a 9×13″ baking dish prepared with cooking spray. Sprinkle on bread crumbs and drizzle the top with olive oil. Bake in a 375-degree oven for 35-40 minutes or until the sides bubble and the top is brown.

Serve with a salad and some of that wonderful Caesar dressing.

Stuffed Grape Leaves with Lemon Egg Curd Sauce

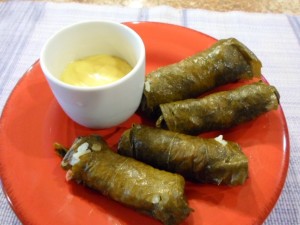
Dolmas

My work in the vineyard continues with training the green shoots through the trellis wires as they extend upward. Many of the tender green leaves are about the size of my hand when I extend my fingers. They are the perfect size for making dolmas or stuffed grape leaves.

Dolmas, or the Greek dolmades, are similar to cabbage rolls in that they are stuffed with rice, vegetables and occasionally meat. There are several recipes, depending on region, but most use uncooked or only partially cooked rice. That requires the rolls to be tightly packed in a pot with a grate or steamer-type device lifting them away from the pot bottom and a heavy plate on top of the packed rolls. The rolls cook at very low heat above seasoned water for over an hour. As the rice expands, the tight packing and heavy plate keep the rice from bursting out of the tender grape leaves.

Sounds like a lot of work to me. I have my own method for dolmas. I’m sure those who are purists will frown at my method, but it’s fairly quick, leaves less room for error and is ready in about 40 minutes. This recipe makes enough for an appetizer or even a nice side dish at any meal.

Stuffed Grape Leaves
18-20 large grape leaves
water
1 lemon
1-1/2 Tbsp. olive oil
1 Tbsp. Kosher salt
4 c. cooked rice
1/2 onion, small diced
1 rib celery, small diced
1/3 or 1/4 lb. ground meat (any type)
1/2 tsp. dried thyme
1 tsp. dried dill
1 tsp. dried parsley
Salt and pepper to taste

Bring a large pot of water to boil. Add olive oil, salt, the juiced lemon and its rind to the water for flavoring. Wash grape leaves and add the boiling water. Blanch the leaves for 3 minutes and remove. Let the leaves cool and reserve the pot water.

Sauté onion, celery, meat and herbs until the meat is cooked and the vegetables are tender. Stir in cooked rice.

Place a rack or steamer insert into a medium sauce pan. Pour about an inch or two of the reserved flavored water into the pot. Build dolmas by laying a leaf bottom-side-up on a cutting board. Scoop about 1 Tbsp. of rice mixture onto the leaf. Fold the bottom of the leaf over the rice, fold the two sides in and roll upward making a small packet. It will look like an egg roll or a small burrito.

Place each packet on the steamer rack with the tip of the leaf on the bottom. Continue to build the packets until all the leaves are used and the rack is full. Cover the pot and bring to a low simmer on the stove. Cook for 30 minutes or until the leaves are tender.

I served the dolmas with a lemon and egg curd sauce. Yogurt seasoned with dill, mint, lemon, salt and pepper would make a nice sauce too.

Lemon and Egg Curd Sauce
1 Tbsp. butter
1-1/2 Tbsp. flour
1 c. chicken stock
1/2 lemon, juiced
1 pinch salt
2 egg yolks

Melt the butter in a small skillet. Add flour and cook to form a paste. Whisk in chicken stock and lemon juice. Continue to cook until the sauce thickens. In a separate small container, add a few spoonfuls of the warm sauce to the egg yolks and stir. That will temper the yolks and keep them from over cooking. Add the tempered egg yolks to the pan sauce and stir until smooth. Season with salt if necessary.